Jun 4, 2026
This is the third of a series of posts detailing how I put interactive, 3D versions of Crazy Taxi’s levels onto the web. If you haven’t read the preceeding posts, I’d highly recommend it, since this builds off many of the ideas developed there.
- Part 1: Introduction & archive reversing
- Part 2: Reversing shape files
- Part 3: Reversing textures & rendering every shape file (you are here)
By the end of Part 2, we’d covered quite a bit of ground: learning about how 3D models are stored as vertex attributes, how those attributes are represented in the GameCube’s Graphics Library (a.k.a. GX), and how Crazy Taxi’s .shp file format contains the GX Display Lists that describe how to draw a model. After all of this, we were only able to render one measly cube.
And we didn’t even cover everything needed to do that! I skipped over how Jasper, noclip.website’s creator, reverse engineered the texture format, and didn’t really touch on how noclip turns GX DisplayLists into WebGL/WebGPU calls that can be rendered in the browser.
In this post, we’ll right some of those wrongs by exploring a much more complicated .shp model, and by the end of this we should be able to render any of Crazy Taxi’s 2,700+ models. And as for which model to target, for my money, there’s really only one choice:
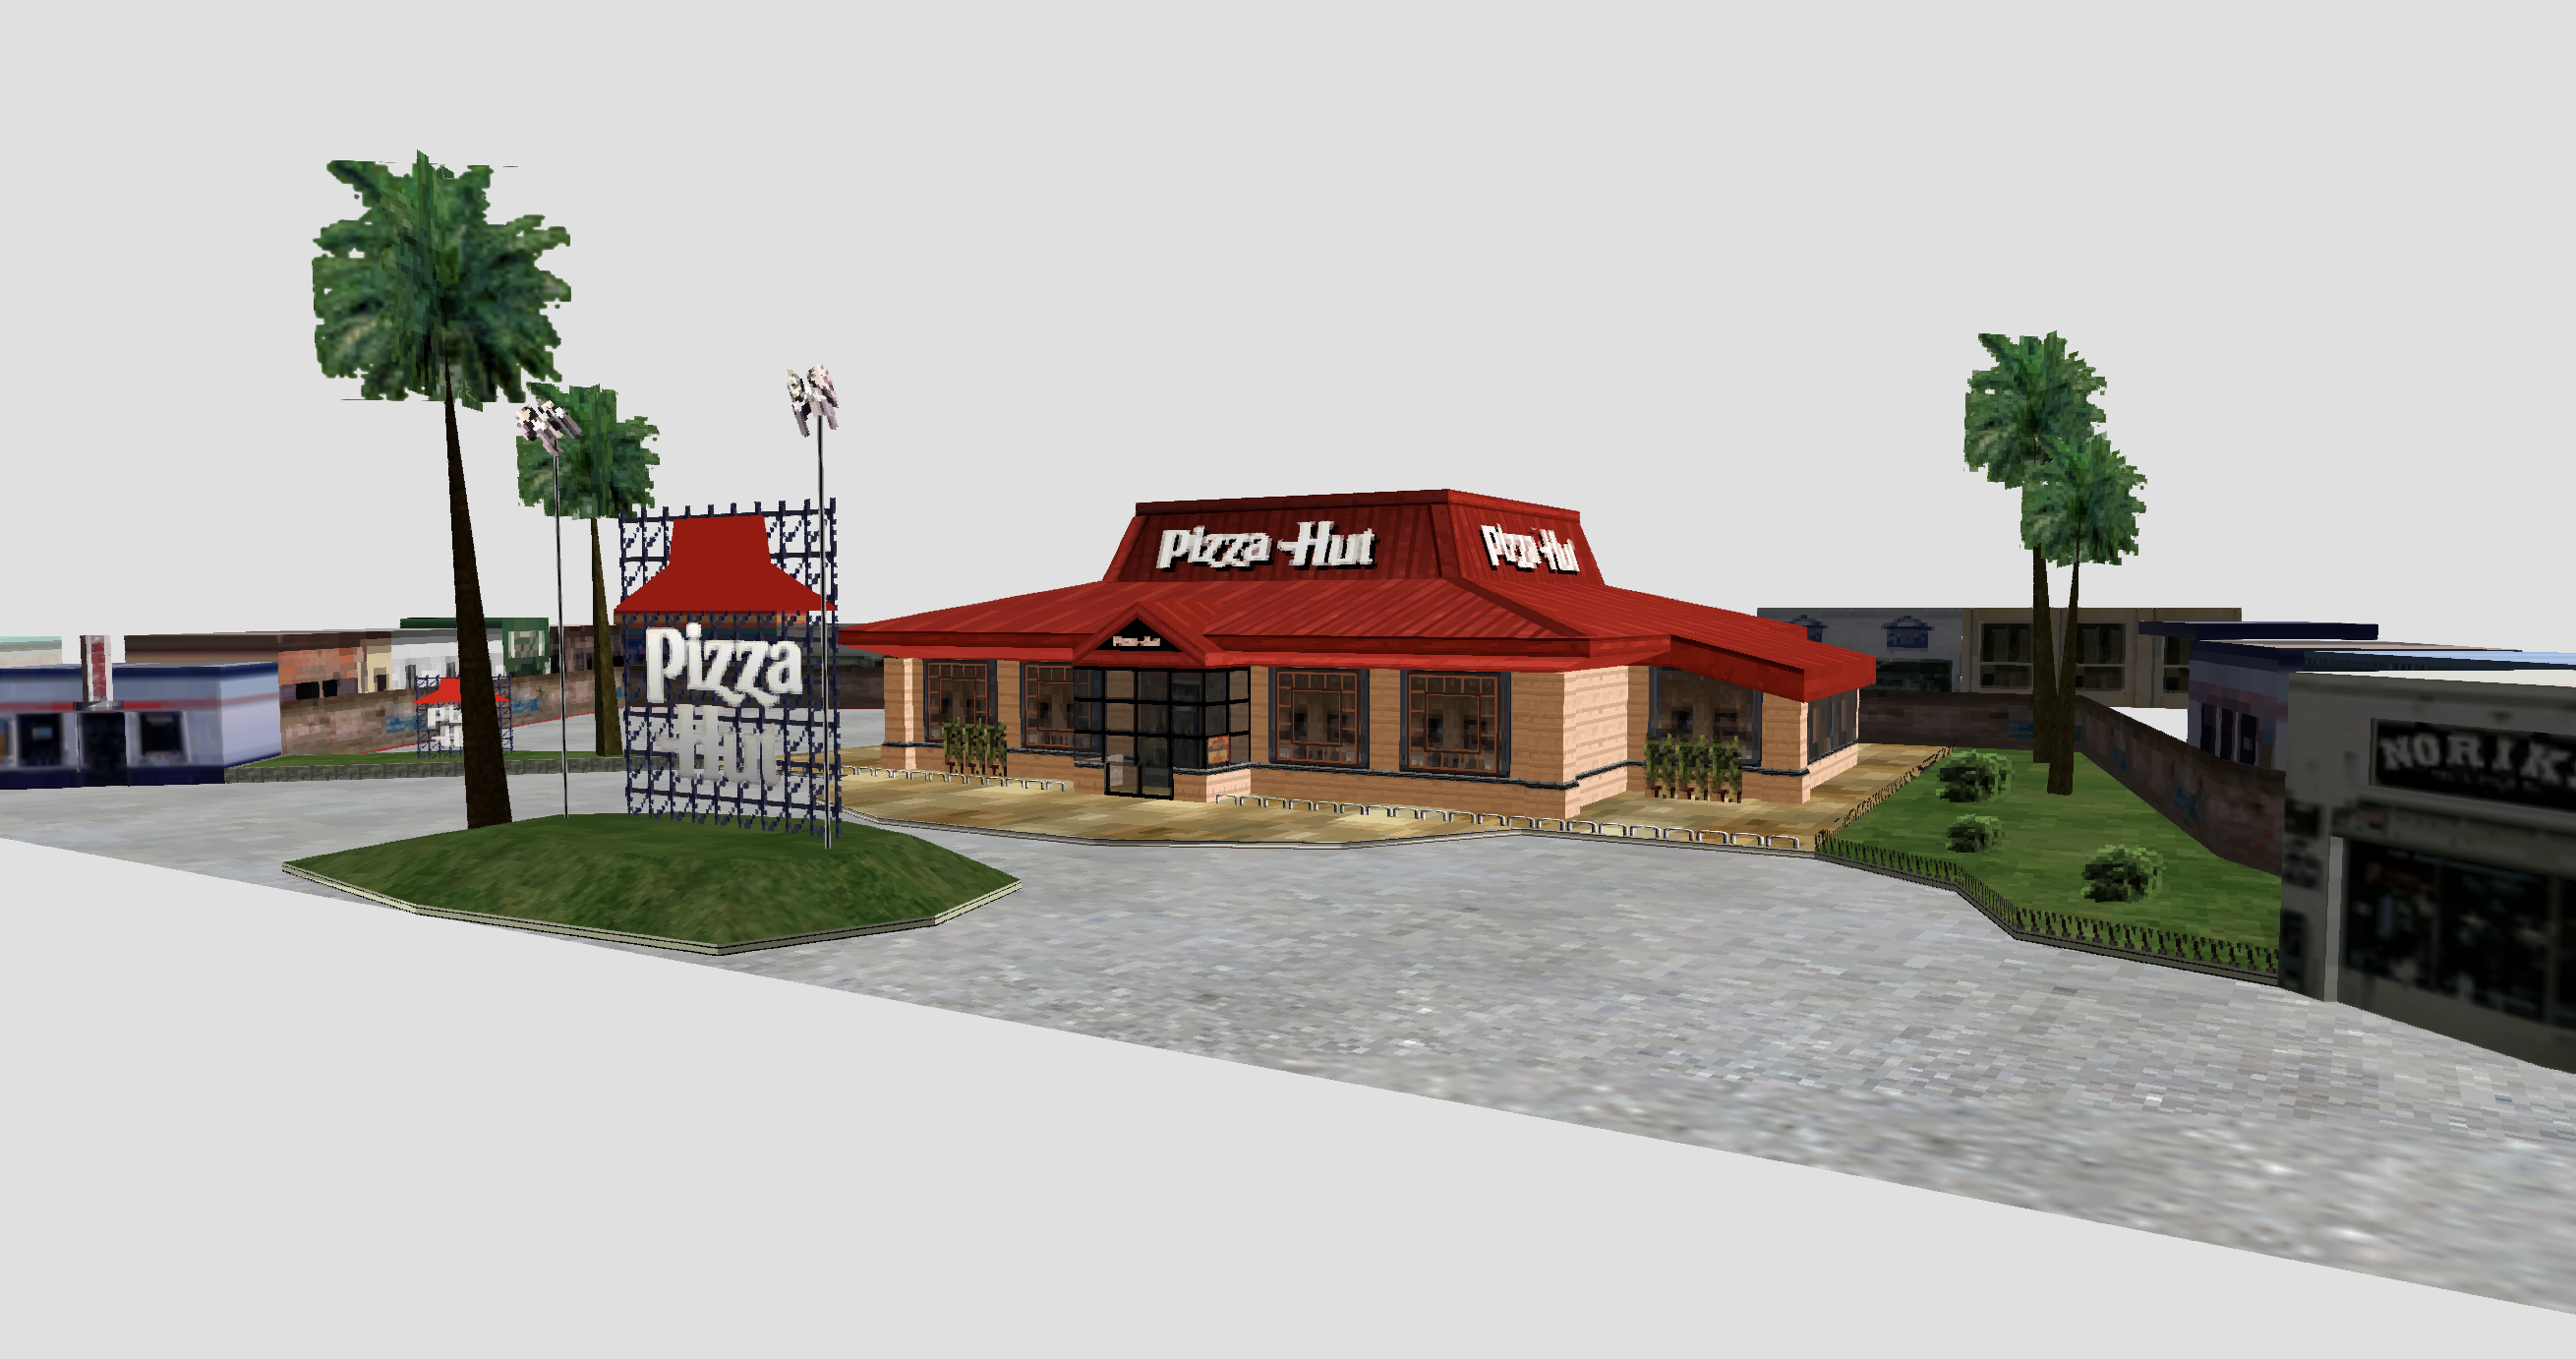
Finding the hut
To be honest, rendering Crazy Taxi’s Pizza Hut was kinda priority number 1 for me when I got started with this project. I can’t exactly say why, but the idea of painstakingly recreating this egregious example of product placement was just really funny to me. Also, because the Pizza Hut, KFC, FILA, and Tower Records models all got de-branded in later versions of the game due to licensing issues, it made this process a bizarre case of consumerist preservation.
As it turns out, finding out which .all archive contains the Pizza Hut was a pretty easy task: simply grep for “pizza” in our expanded archive directories:
$ grep -R -i pizza ct-extract/
Binary file ct-extract/poldc2_stream.all/course_dc3b_052k.shp matches
Binary file ct-extract/poldc1_stream.all/course_4b_048_a_ph.shp matches
Looking for “pizza” in the strings output of these models gives us some more helpful output:
$ strings ct-extract/poldc2_stream.all/course_dc3b_052k.shp | grep -i pizza
TT_PizzaHut_log_01_tr.tex
$ strings ct-extract/poldc1_stream.all/course_4b_048_a_ph.shp | grep -i pizza
TT_PizzaHut_log_01_tr.tex
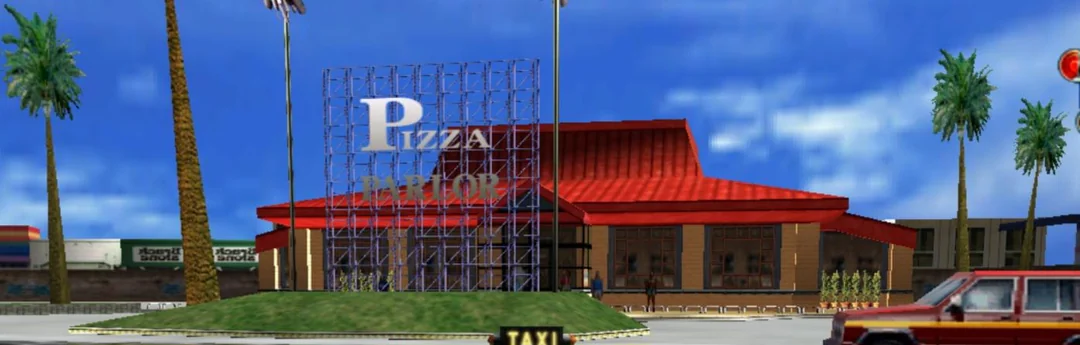
So, assuming that “log” means “logo”, it looks like we have two .shp models that contain a Pizza Hutty logo.. At first it might seem odd that there’s two Pizza Hut models, but if you’ve played the console version of Crazy Taxi, you might already know why that is.
When Crazy Taxi was ported from the arcade to consoles, it touted both its original “Arcade Mode” map, as well as a new and much larger map which was confusingly named “Original Mode”. And both maps contain a Pizza Hut model with slightly different surroundings:
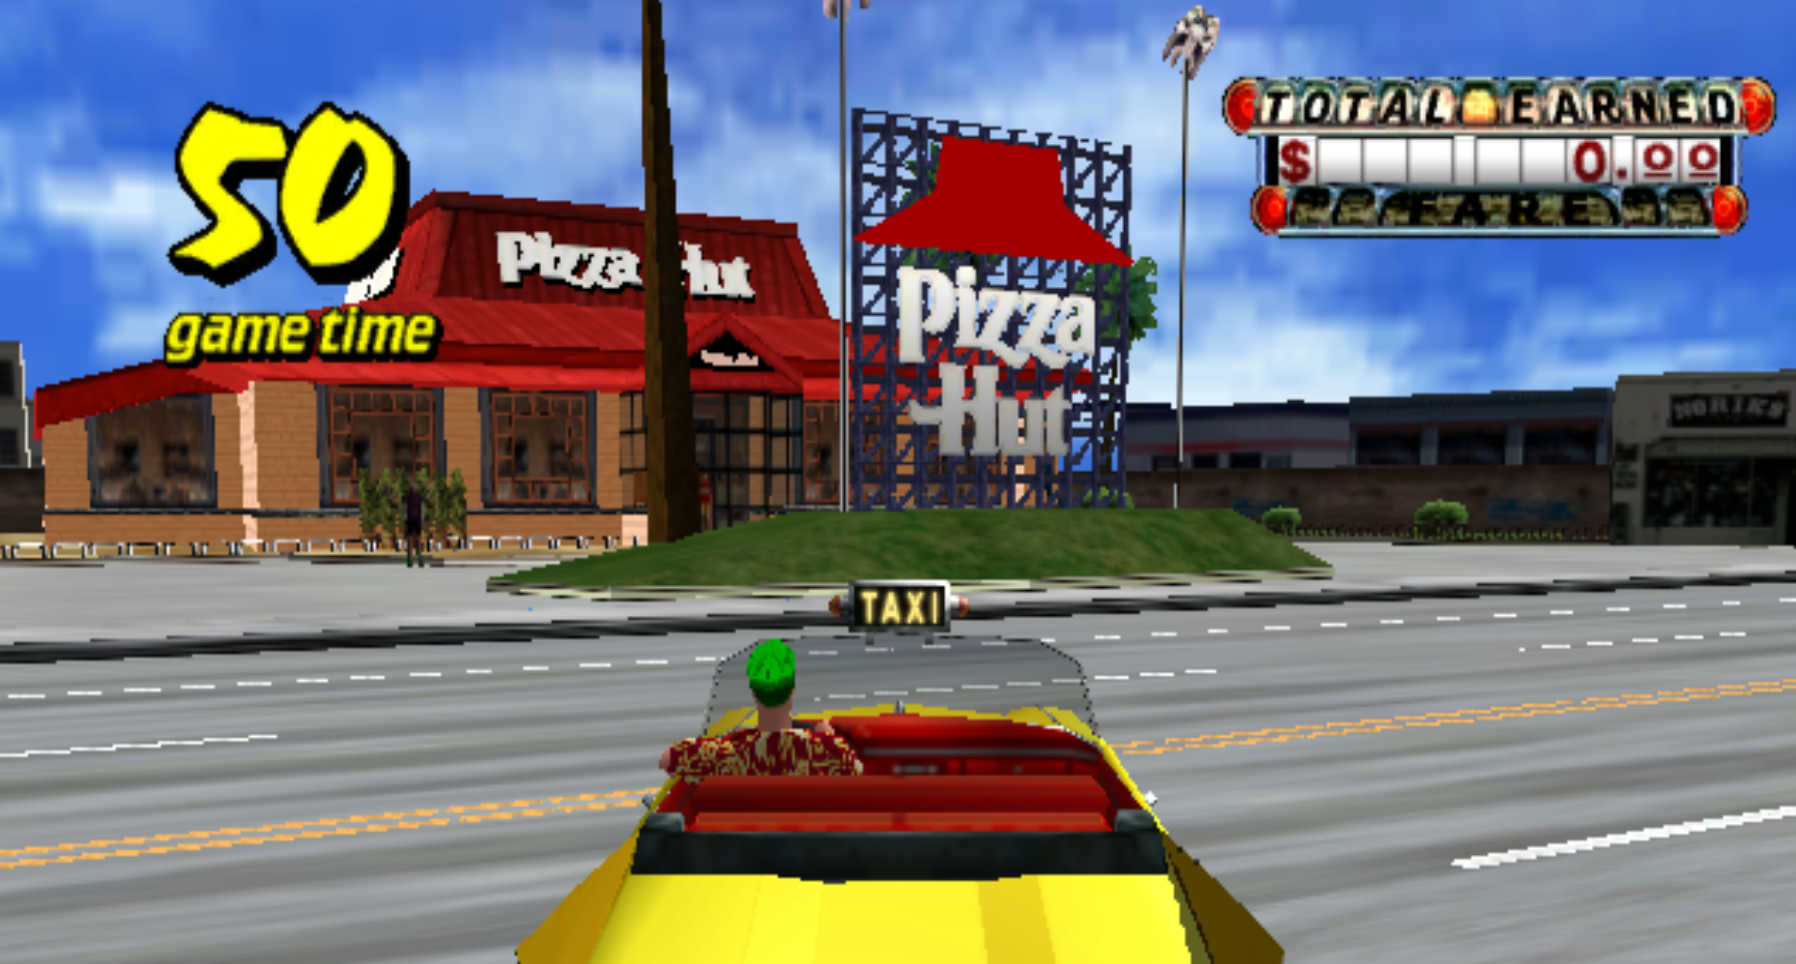
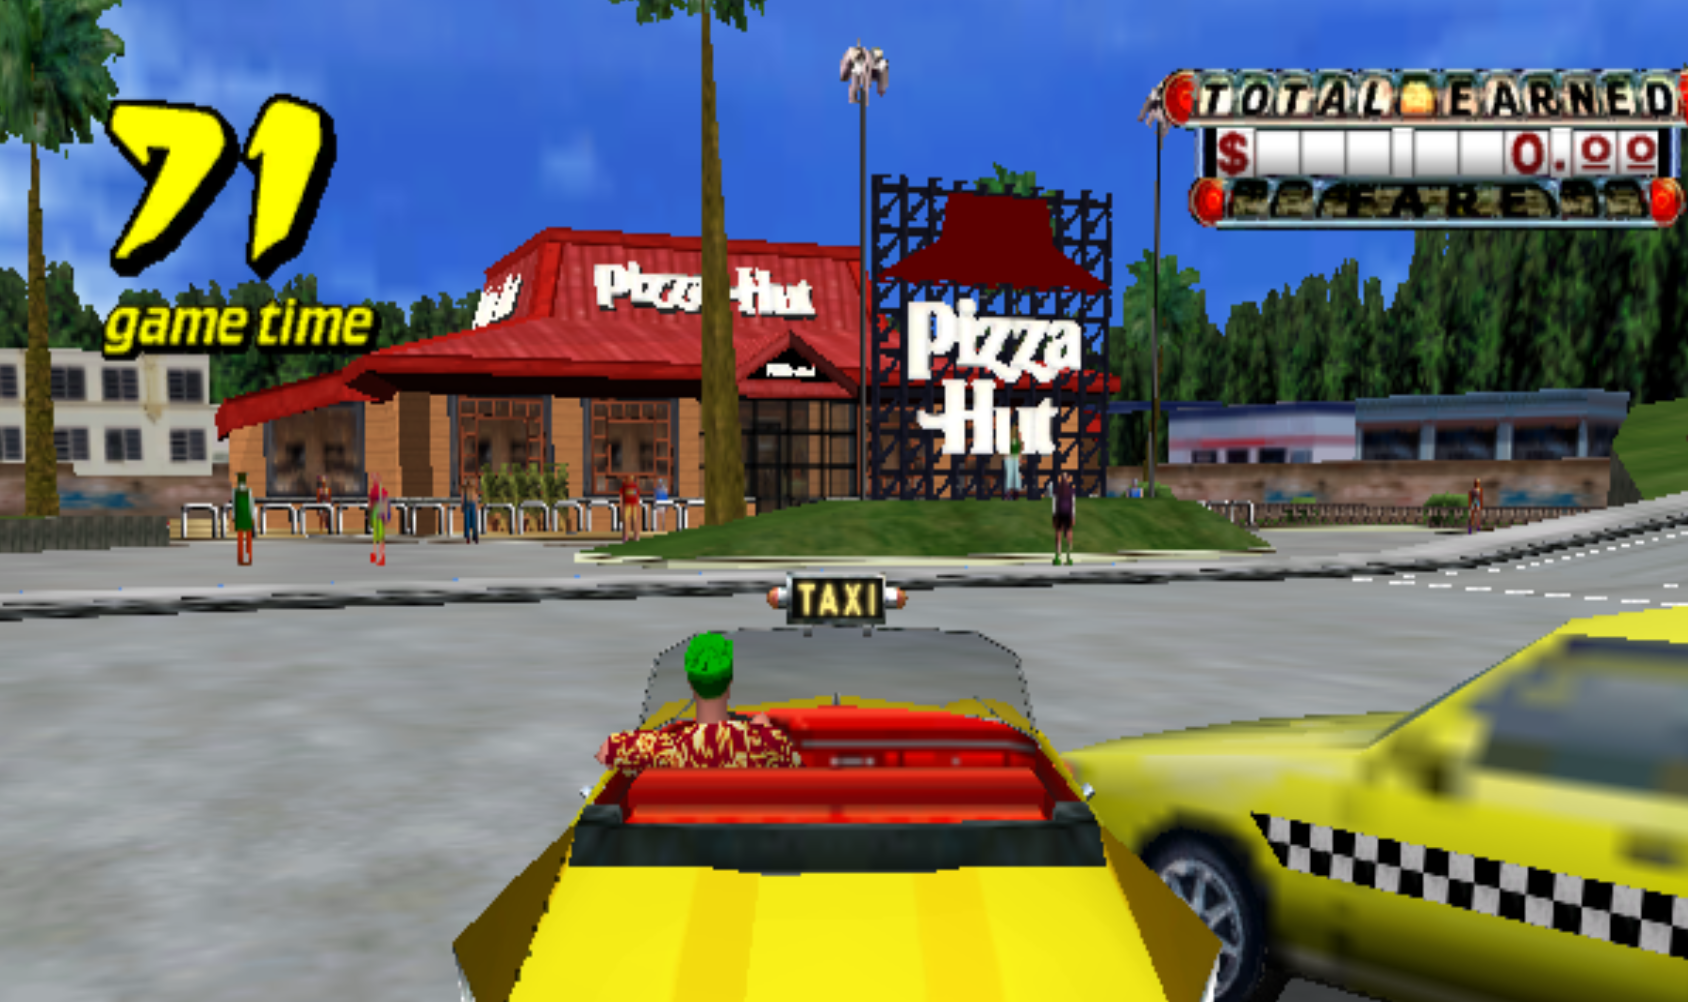
Either model would work just fine for our purposes, but let’s see if we can determine which model is which.
Original Recipe
So we know our Pizza Huts are in poldc1_stream.all and poldc2_stream.all, but after grepping around some more, I couldn’t find anything clearly indicating which one of these files corresponds to Arcade Mode vs. Original Mode. That said, we can definitely make some educated guesses. Here are all the archive files that start with “pol” (which I’m guessing is short for “polygon”):
polDC0.all
poldc1_stream.all
poldc1.all
poldc2_stream.all
poldc2.all
poldc3_stream.all
poldc3.all
Being that there are 2 main maps in the GameCube version (Arcade and Original) and a bunch of mini-maps (the Crazy Box collection), my guess was that the “dc1”, “dc2”, and “dc3” might refer to those, with “DC0” seemingly being the odd one out as it has no _stream companion. Maybe it’s used for shared models, or models used in the main menu?
And, since our Pizza Hut .shp files were in archive files referencing dc1 and dc2, I assumed that those might be our Arcade and Original maps.
But is dc1 the Arcade map, or is dc2? Well, I know the Original mode map features a sprawling subway system, and only poldc2.all contains models with “train” in their names. So, for now, let’s assume that dc1 refers to Arcade and dc2 refers to Original.
About those textures
Now that we’ve got a guess on which .shp represents the Arcade Mode’s Pizza Hut, I’d like to finally demystify how we parsed the textures in the previous post’s cube model. But first, how do we find a model’s textures?
Recall that our .shp file contains not only a model’s vertex attributes and GX Display Lists, but also a list of texture files at the end. Let’s take a look at the list for the Arcade version of Pizza Hut:
course_4b_048_a_ph.shp
Offset
00000000 ⋮ 00007c4000007c5000007c6000007c7000007c8000007c9000007ca000007cb000007cc000007cd000007ce000007cf000007d0000007d1000007d2000007d3000007d4000007d5000007d6000007d7000007d8000007d9000007da000007db000007dc000007dd000007de000007df000007e0000007e1000007e2000007e3000007e4000007e5000007e6000007e7000007e8000007e9000007ea000007eb000007ec000007ed000007ee000007ef000007f0000007f1000007f2000007f3000007f4000007f5000007f6000007f7000007f8000007f9000007fa000007fb000007fc000007fd000007fe000007ff000008000000080100000802000008030000080400000805000008060000080700000808000008090000080a0000080b0000080c0000080d0000080e0000080f000008100000081100000812000008130000081400000815000008160000081700000818000008190000081a0000081b0000081c0000081d0000081e0000081f000008200000082100000822000008230000082400000825000008260000082700000828000008290000082a0000082b0000082c0000082d0000082e0000082f000008300000083100000832000008330000083400000835000008360000083700000838000008390000083a0000083b0000083c0000083d0
Bytes
(start of file)
0x7c40 hidden
ASCII
-
⋮
Data Inspector Range:
| Bits | uint | int | float |
|---|---|---|---|
| 8 | - | - | - |
| 16 | - | - | - |
| 32 | - | - | - |
Endianness:
Unsurprisingly, there’s quite a few more textures here than were in cube0.shp, and keen eyes might recognize white.tex, which was also present in cube0.shp. Actually, every single .shp file’s texture list starts with white.tex, and I never really figured out why.
Anyway, our goal is to turn this block of data into a list of filenames. You might take a second to scan through this listing and see if you can identify how to parse it into one.
Using a similar analysis to .all files in Part 1, it’s pretty clear that this list uses fixed-length blocks of 0x2c bytes, and since the strings themselves have no clear lengths defined, we can assume they’re null-terminated, i.e. the string’s end is indicated by a 00 byte. And sure enough, we do see a null byte at the end of each occurrence of .tex. But we’ve also got some random ASCII data strewn after these termination bytes, such as at offsets 0x7ca6 and 0x7cd4.
While this might be meaningful data, I think this is much more likely to be junk data similar to what we saw at the end of Part 2, Section 7. And since it always follows the terminating null byte, it’s very easy to simply discard this data.
Now that we’ve got a list of the Pizza Hut’s texture files, let’s try reading one of them.
Photo Shop
The first texture listed in our Pizza Hut model is called TT_shop_04.tex, which we can find in all three of the level texture archives: texDC1.all, texDC2.all, and texdc3.all. It’s possible these are all the same, but since we’re targeting the Arcade mode version, let’s pick the one from texDC1.all. Here’s the first chunk of data from the texture file:
TT_shop_04.tex
Offset
00000000000000100000002000000030000000400000005000000060000000700000008000000090 ⋮ 00000aff
Bytes
0xa5f hidden
(end of file)
ASCII
⋮
-
Data Inspector Range:
| Bits | uint | int | float |
|---|---|---|---|
| 8 | - | - | - |
| 16 | - | - | - |
| 32 | - | - | - |
Endianness:
Now, since Jasper’s the one who figured out the .tex format, I’ll mostly be echoing his wisdom here, but if you’ve worked with textures a bit before, you might be able to figure out a bit of what’s going on here without too much difficulty.
That’s because texture formats are often just different rearrangements of the same basic types of data: the dimensions of the texture, maybe a flag or two describing the format of the pixel data, and some information about a somewhat complicated thing called a mipmap. Setting aside that last item for now, take a look at the binary data and see if you can make a guess as to the dimensions our texture. Hint: it’s usually a nice even power of 2, and will be rather small since we’re looking at a GameCube texture.
Once we’ve got our dimensions, the next step is figuring out what the pixel data’s format is, and here we’ve got good news and bad news. The bad news is there’s a ton of pixel data formats out there, and some of the more common compressed ones (like Unity’s Crunch) are complicated and not well documented. The good news is GameCube’s GX API only uses a handful of formats, all of which are fairly well understood at this point. And notably, one of the more common GX formats called CMPR (for “compressed”) uses a flag value 0x0E, which just so happens to be what we see in TT_shop_04.tex at offset 0x0C!
But before we dig into how these pixels are encoded, let’s revisit mipmaps, since they’ll soon become quite relevant.
A little image goes a long way
Mipmaps are a fairly old and commonplace technique of storing smaller versions of a texture alongside the original. Usually, these smaller copies are ones whose dimensions are reduced by increasing powers of 2, so in addition to our 64x64 texture above, its mipmap would also include copies at 32x32, 16x16, 8x8, and so on. Why would we do this? Well, it all comes down to nasty property of digital signals called aliasing.
Suppose you’re looking at a 3D scene of a black and white checkerboard floor. The tiles closest to your camera will look pretty normal, since the tiles are large enough that your screen’s pixels generally only need to be entirely white or entirely black. But because of perspective, as your eye looks farther into the distance, the tiles will become smaller. And since the pixels on your screen aren’t getting any smaller, eventually you’ll run into instances where a single pixel will need to somehow depict both a black and a white tile, meaning some of the checkerboard image’s data will necessarily have to be discarded.
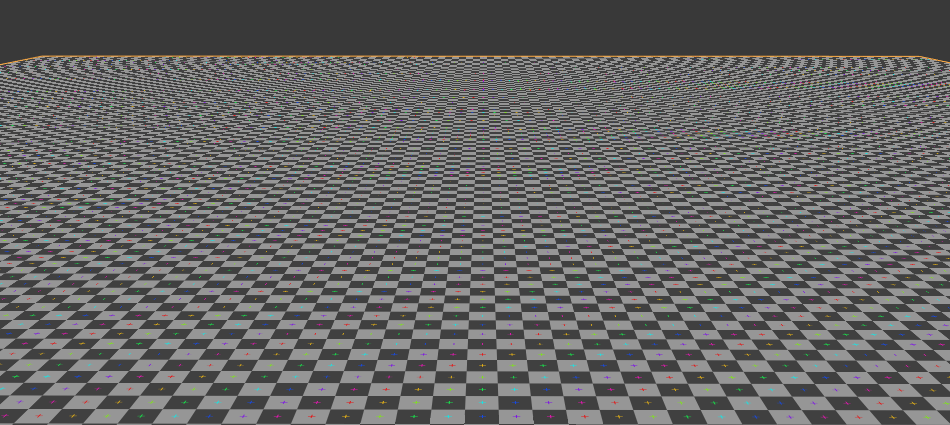
As you can see in this image, this can lead to all sorts of artistically undesirable effects, such as jaggies and moiré patterns. These are due to the mathematically fascinating, but extremely obnoxious, phenomenon known as aliasing. Aliasing occurs whenever you sample a signal at a much lower frequency than its original, which in our case translates to picking a pixel color from a texture at a lower resolution than the original.
You’ve probably heard of anti-aliasing, which refers to a family of techniques for mitigating the aforementioned jaggies etc. Unfortunately, anti-aliasing techniques are generally more computationally expensive than simply telling the GPU to simply plop down the color of the nearest texture pixel, or texel. So, instead of letting the shader do all the work all the time, developers will usually create pre-downsampled versions of their textures to be used when the image would be rendered small enough. And this, dear readers, is what a mipmap is.
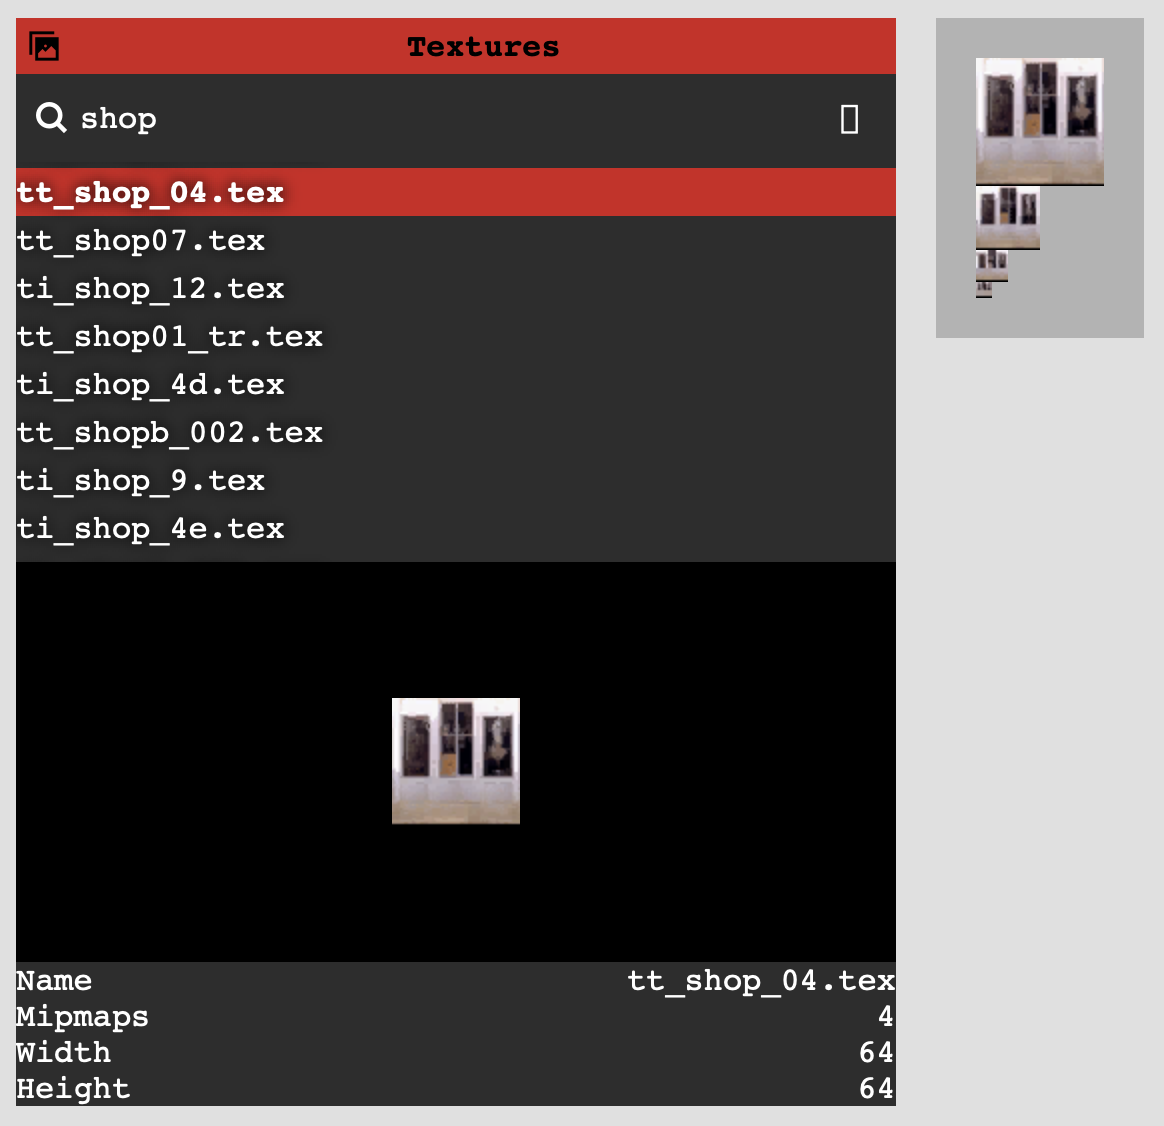
A GPU can easily use its depth buffer to sample smaller mips for further pixels, letting us do a depth-aware form of anti-aliasing very cheaply. Here’s the same checkerboard example from above, but this time using mipmapping to prevent aliasing:
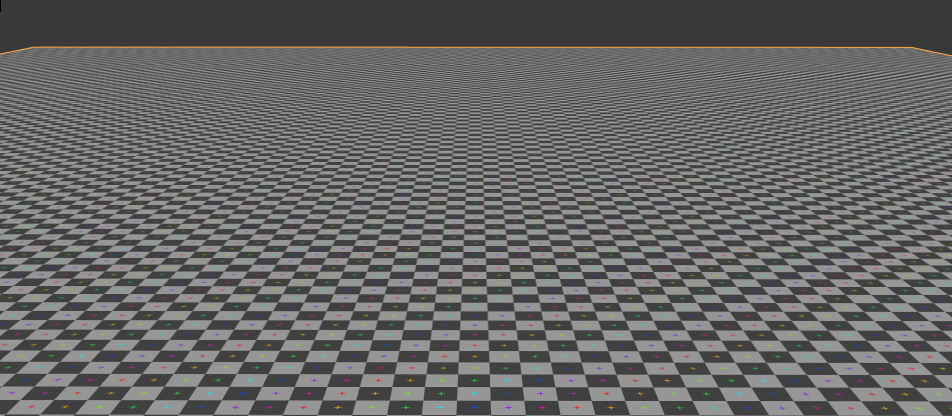
With all of this in mind, let’s see if we can make sense of our texture’s pixel data.
CMPR? I hardly KNWR!
So what does our texture data look like? Well, since it’s compressed using Nintendo’s CMPR format, it’s not super easy to visually inspect the values and look for RGB pixel data. But based on noclip’s implementation of CMPR, we can do some basic sanity checks here.
CMPR images are composed of 8-byte blocks, each of which represents a 4x4 grids of pixels in the image. A block starts with two colors encoded as RGB565 values, a two-byte format where 5 bits are used to encode a red value, 6 bits are used for green, and 5 are used for blue. Two more colors are produced by blending between the initial two, forming a table of 4 colors. The remaining 4 bytes is used to represent the 16 pixels, each being composed of two bits that represent which of the four colors is used for that pixel.
To illustrate this, I made a little widget that decodes each block of pixels individually. Select blocks in the list at the top-left, and it’ll show how the 8 bytes of that block turn into 16 pixels:
TT_shop_04.tex
Bytes: f7bef75d01030103
| Color | Source | Result |
|---|---|---|
| 0 | 11110 111101 11110 | #f7f7f7 |
| 1 | 11110 111010 11101 | #f7ebef |
| 2 | blend(color0, color1) | #f7f2f4 |
| 3 | blend(color0, color1) | #f7eff2 |
Pixels:
00
00
00
01
00
00
00
11
00
00
00
01
00
00
00
11
Result texture:
It’s actually pretty remarkable that we can achieve such a decent color gradient using only 4 bytes of data, and by using just 4 more bytes for 16 pixels, we end up with a surprisingly rich way to represent an image using very little data.
Since we know our image’s dimensions (64x64), we would expect our texture to have of these blocks. But recall that our texture is mipmapped, so there’s also a 32x32 copy of the texture, which works out to more blocks. Then a 16x16 copy (16 blocks), then an 8x8 (4 blocks), a 4x4 (1 block), and finally the 2x2 and 1x1 mips which are allotted 1 block apiece.
All told, that’s 343 blocks, which at 8 bytes per block yields 2,744 bytes total for this texture. But if you subtract the offset where TT_shop_04.tex’s pixel data starts (0x60) from where it ends (0xAFF), you get 2,720 bytes. We’re missing 24 bytes, or 3 CMPR blocks!
As it turns out, that’s equal to the number of blocks for the 4x4, 2x2, and 1x1 mips. So one might guess that 3 of our 6 mips are excluded from the texture data, and as it turns out, the u32 at offset 0x18 of TT_shop_04.tex happens to equal 3. Doing a similar block-count analysis on other CMPR textures reveals the same pattern, so let’s go ahead and name the u32 at 0x18 num_mips.
Now that we’ve squared away our textures, let’s figure out how to get the rest of this Pizza Hut drawn.
VAT hunting
Recall from Part 2 that the thing which actually renders stuff on GameCube is called a Display List (or DL), and it starts with an index into Vertex Attribute Table (or VAT). The VAT contains all the useful format information for the shape’s vertex positions, texture coordinates (aka uv coordinates), color data, etc. But crucially, the DLs only contain an index into the VAT, and not the VAT entry itself.
Since we didn’t have the VAT entry for cube0.shp in Part 2, we basically eyeballed the binary data for colors, positions, etc. until we figured out their various formats, allowing us to actually render the dang thing. That approach just isn’t going to scale to 2,700+ other models, so it’s high time we actually figured how those VAT entries are created.
And I won’t beat around the bush, this process sucked. I ended up spending hours in Ghidra, an open source reverse engineering toolkit, poring over the game’s executable trying to find something that resembled the VAT list. And although I won’t be detailing this exploration since it was mostly fruitless, I wanted to mention it because sometimes the process of reverse engineering has dead ends and leads that go nowhere, and that’s OK! During this process I still learned a lot, and ended up manually annotating a bunch of code that ended up being helpful later in the project.
All that said, I did find one promising lead in Ghidra: the GXFIFO register. While flailing about and basically decompiling functions at random, I found a bunch that referenced a named register called GXFIFO. I recognized GX as the codename for GameCube’s graphics system, and knew FIFO to mean “first-in, first-out”, which generally refers to a queue-like interface. Asking Jasper about it, he mentioned that reading/writing to the GXFIFO register is pretty much the only way to interface with the GameCube’s GPU pipeline. Display Lists, for example, are submitted to the GPU by writing them to GXFIFO. And indeed, when a game creates VAT entries, it does so by writing them there.
He also mentioned that if spelunking in Ghidra isn’t seeming fruitful, the GameCube emulator Dolphin has a great feature called the FIFO Player which records all data written to the GXFIFO register and lets you inspect them. This, as it turns out, was our ticket.
Run it back
As I alluded to earlier, virtually everything on the screen in a GameCube game is drawn by sending commands to the GXFIFO register. So, if you keep track of the data written to GXFIFO, along with some bookkeeping about the state of some other registers, you can effectively analyze and play back any number of frames without even having the game’s binary. This is exactly what Dolphin’s FIFO Player does, and despite having a few warts, it’s one of the most useful tools I used while reversing Crazy Taxi.
Here’s an example of the FIFO player analyzing a frame captured outside of our Pizza Hut:
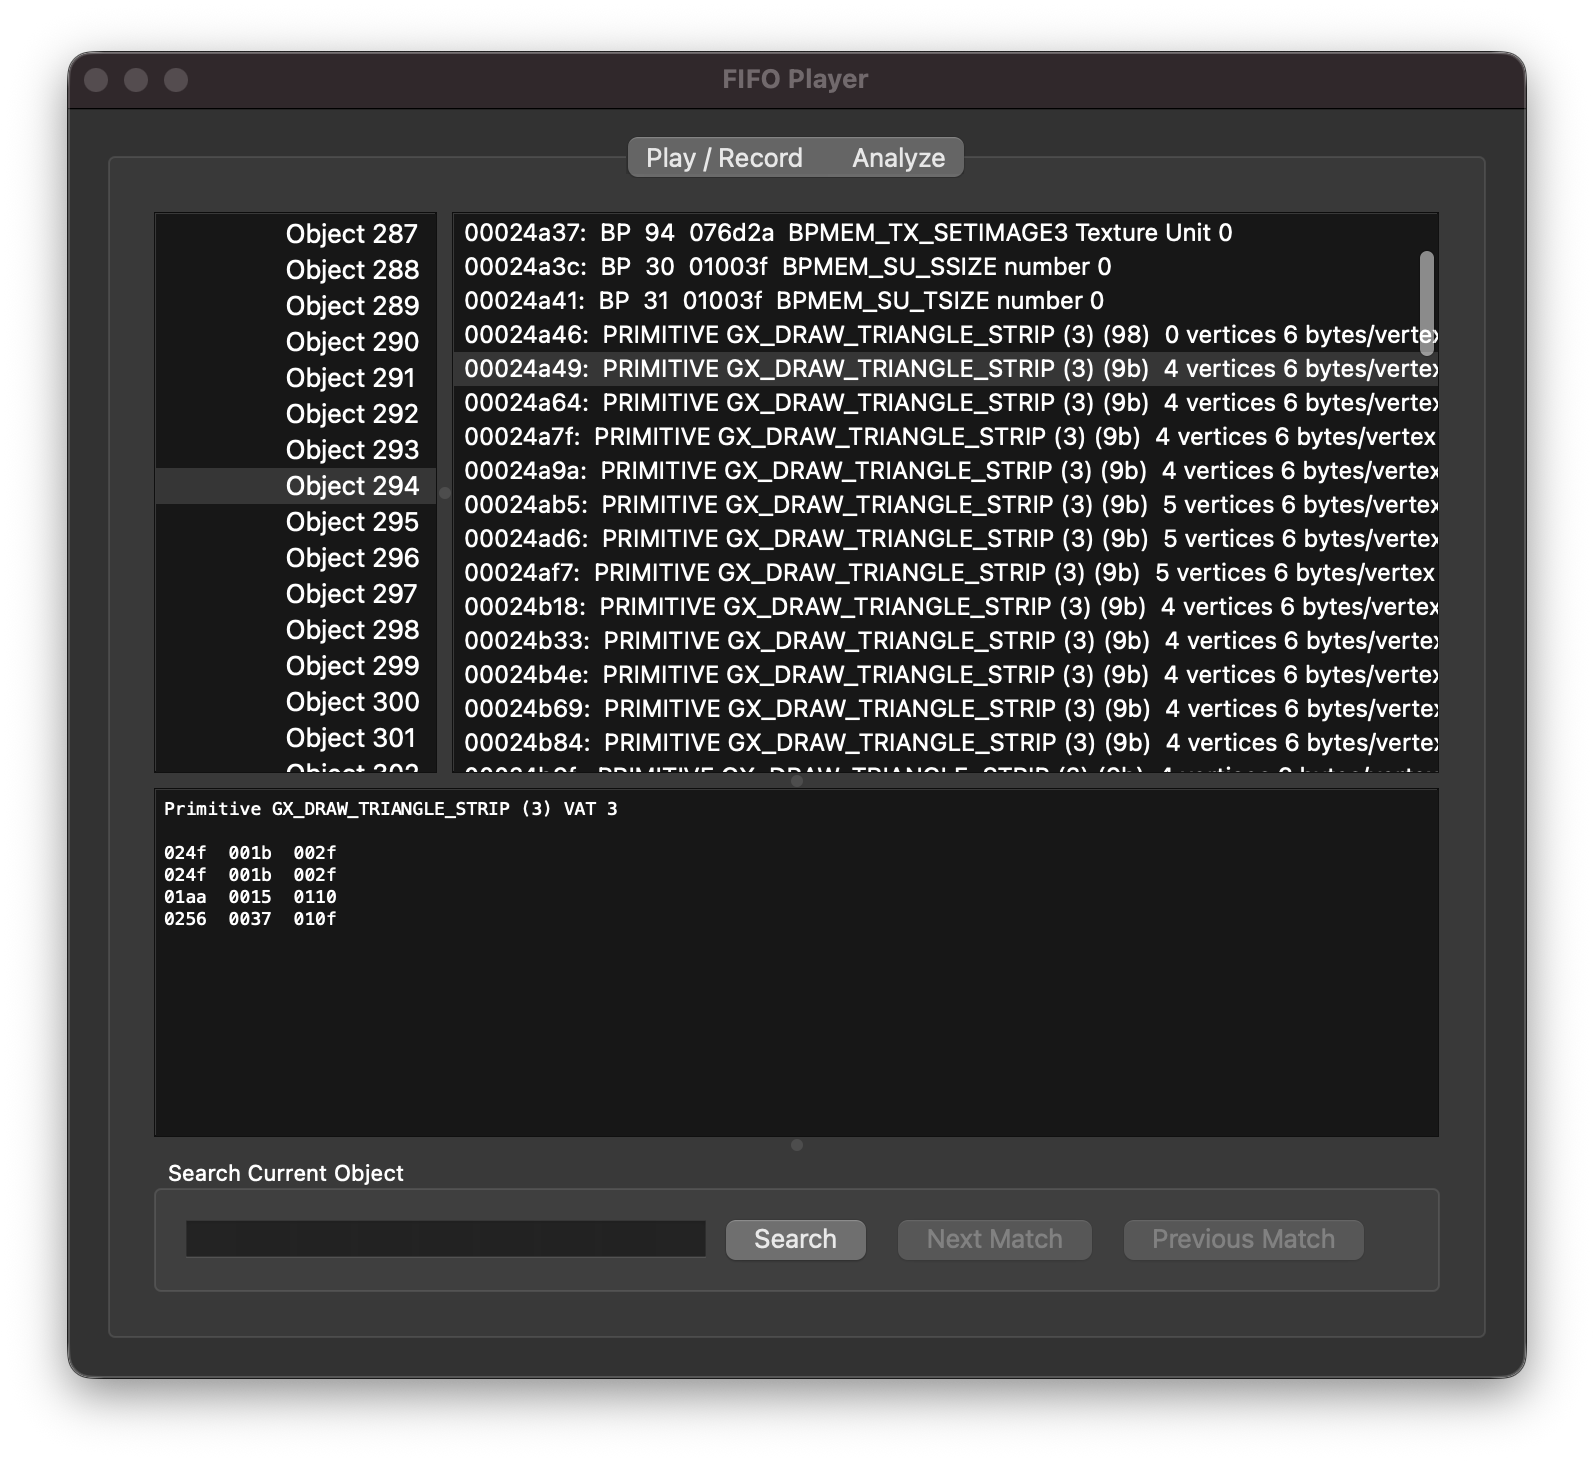
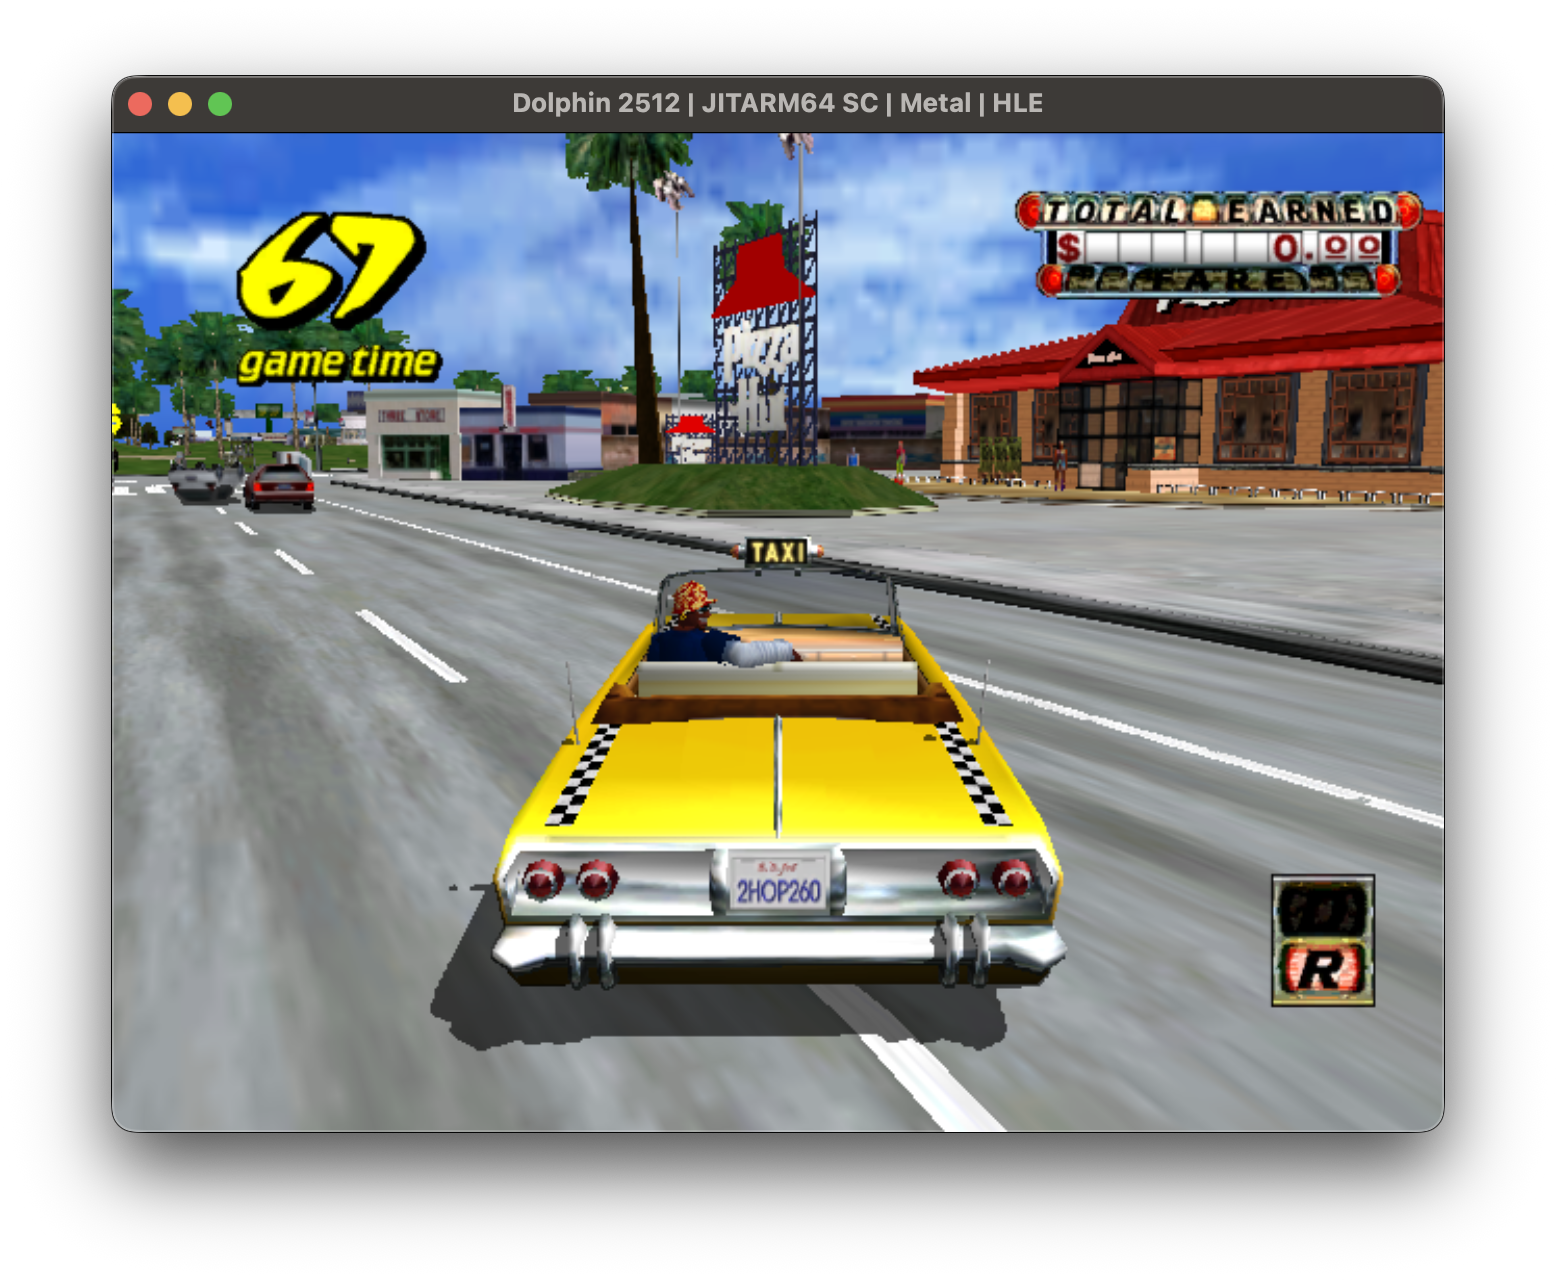
In the screenshots above, we’re looking at a single GX_DRAW_TRIANGLES Display List that happens to correspond to the Pizza Hut’s roof. How’d I know it’s the roof? In the FIFO Player window, if you click back over to the “Play/Record” tab, you can set a limit to how many objects are rendered per frame. As it turns out, if you set that limit to 293 objects, the roof disappears, but set it to 294 and it comes back, meaning “Object 294” is our guy.
Tabbing through the Display Lists is very cool, but as a reminder, we’re here to see some VAT entries. And although the DL in the screenshot above does mention VAT 3, the VAT entry itself is nowhere to be found in any of the FIFO calls. Tragically, that’s because by the time this frame was recorded, the VAT entries had all already been sent to the GXFIFO register. So what do we do?
We fork Dolphin
We fork Dolphin. You see, as I mentioned before, the FIFO Player records not only GXFIFO data, but also some data about the other GameCube registers. And as it happens, VATs are stored in a section of registers called the Command Processor, or CP. If we modify Dolphin to dump the CP registers, we can view the state of the VAT at the time of this frame!
This can be done in a couple ways, but I went about it by iterating through every single CP register related to VATs on each draw call. Now, for every single draw call, Dolphin will dump every VAT entry, yielding 8 sections (one per VAT entry) of rather verbose info like this:
VTXFMT 3
Position elements: 3 (x, y, z) (1)
Position format: Short (3)
Position shift: 14 (6.1035156e-05)
Normal elements: 1 (normal) (0)
Normal format: Unsigned Byte (0)
Color 0 elements: 3 (r, g, b) (0)
Color 0 format: RGB 24 bits 888 (1)
Color 1 elements: 3 (r, g, b) (0)
Color 1 format: RGB 16 bits 565 (0)
Texture coord 0 elements: 2 (s, t) (1)
Texture coord 0 format: Short (3)
Texture coord 0 shift: 7 (0.0078125)
Byte dequant: shift applies to u8/s8 components
Normal index 3: single index shared by normal, tangent, and binormal
Texture coord 1 elements: 1 (s) (0)
Texture coord 1 format: Unsigned Byte (0)
Texture coord 1 shift: 0 (1)
Texture coord 2 elements: 1 (s) (0)
Texture coord 2 format: Unsigned Byte (0)
Texture coord 2 shift: 0 (1)
Texture coord 3 elements: 1 (s) (0)
Texture coord 3 format: Unsigned Byte (0)
Texture coord 3 shift: 0 (1)
Texture coord 4 elements: 1 (s) (0)
Texture coord 4 format: Unsigned Byte (0)
Enhance VCache (must always be on): Yes
Texture coord 4 shift: 0 (1)
Texture coord 5 elements: 1 (s) (0)
Texture coord 5 format: Unsigned Byte (0)
Texture coord 5 shift: 0 (1)
Texture coord 6 elements: 1 (s) (0)
Texture coord 6 format: Unsigned Byte (0)
Texture coord 6 shift: 0 (1)
Texture coord 7 elements: 1 (s) (0)
Texture coord 7 format: Unsigned Byte (0)
Texture coord 7 shift: 0 (1)
As it happens, regardless of which frame I dumped these VAT entries, the output was always the same. And while that ends up being incredibly convenient for us since it means Crazy Taxi only uses 8 VATs, it’s by no means guaranteed to be the case! If a game needs more than 8 VAT formats, it can create new ones at runtime, meaning the CP state might change between frames. But, because Crazy Taxi has a fairly simple set of model formats, it seems to set its 8 VATs at startup and then never changes them. As such, we can just record the above output for a single draw call, and then we’ve got all the VAT entries we’ll need to render every model in the game.
noclip expects VATs to be defined in terms of TypeScript enums, so the Dolphin output above would become something like this in our renderer:
let vat: GX_VtxAttrFmt[] = [];
vat[GX.Attr.POS] = {
    compCnt: GX.CompCnt.POS_XYZ,
    compType: GX.CompType.S16,
    compShift: 14,
};
vat[GX.Attr.NRM] = {
    compCnt: GX.CompCnt.NRM_XYZ,
    compType: GX.CompType.U8,
    compShift: 0,
};
vat[GX.Attr.CLR0] = {
    compCnt: GX.CompCnt.CLR_RGB,
    compType: GX.CompType.RGB8,
    compShift: 0,
};
vat[GX.Attr.CLR1] = {
    compCnt: GX.CompCnt.CLR_RGB,
    compType: GX.CompType.RGB565,
    compShift: 0,
};
vat[GX.Attr.TEX0] = {
    compCnt: GX.CompCnt.TEX_ST,
    compType: GX.CompType.S16,
    compShift: 7,
};
vats[GX.VtxFmt.VTXFMT3] = vat;Repeat for each VAT, and now noclip knows how to read every draw call for every model.
So close, and yet…
So we’ve got our textures decoded, and we’ve got our DLs matched up with their VATs, but there’s one major thing keeping us from Pizza Time: how do we know which textures each DL should use?
In the last post, cube0.shp had 2 draws and 2 textures, and simply lining them up worked just fine. And if we look at course_4b_048_a_ph.shp a.k.a. Pizza Hut, we’ve got 44 draws and 44 textures. So surely we can just do the same thing?
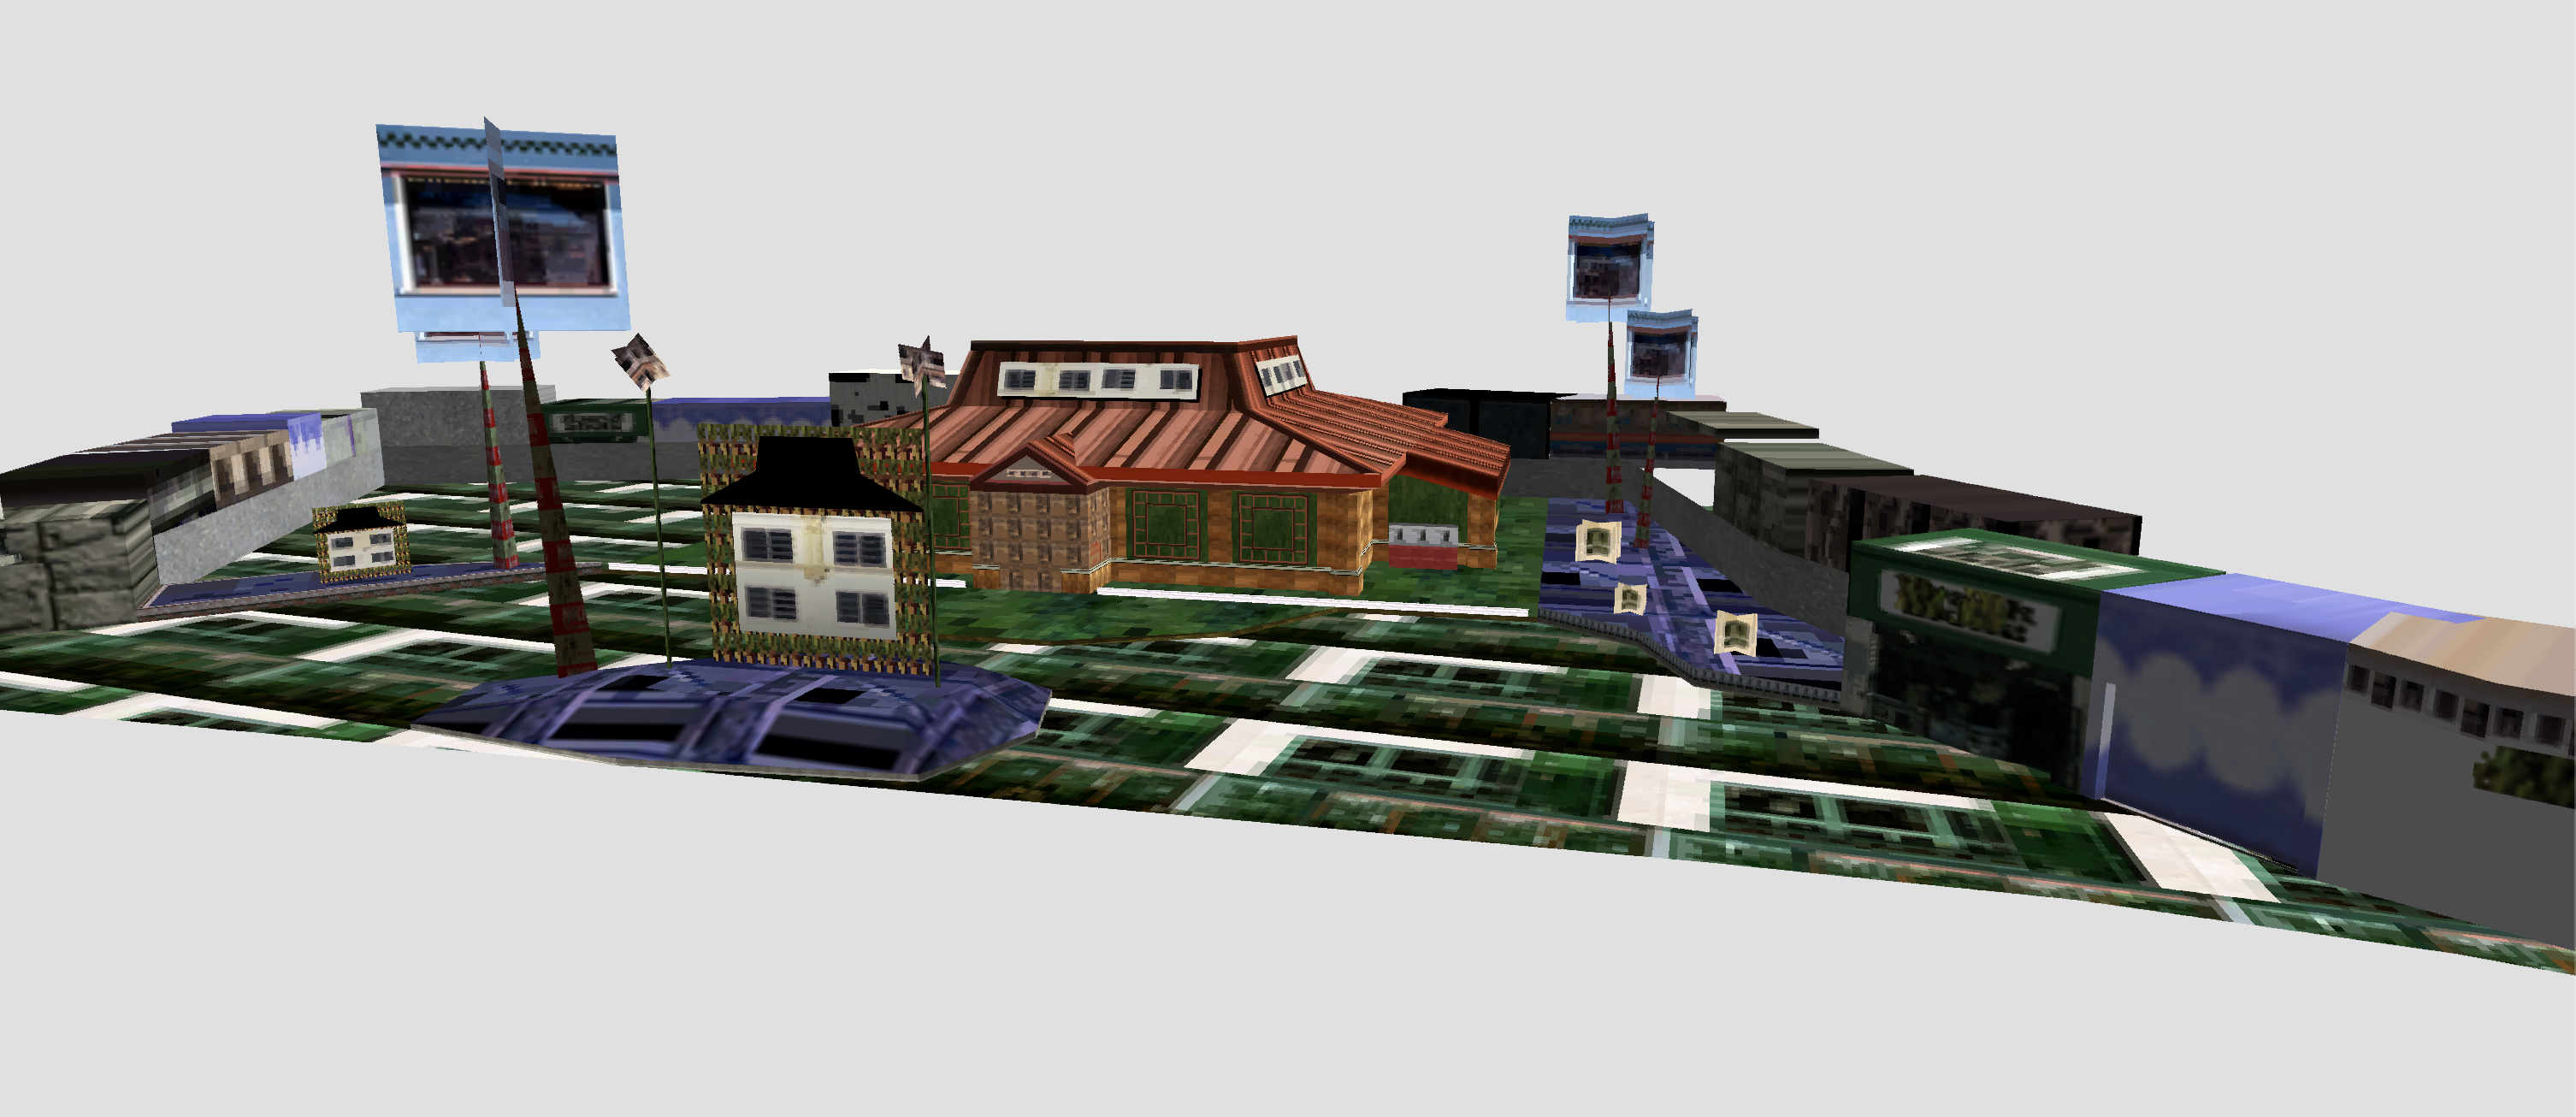
Well, it’s certainly a look.
On the bright side, we seem to have the right shape for a Pizza Hut, which means our VATs are probably just fine, but clearly something’s terribly wrong with the textures. And besides looking terrible, this approach just breaks for some other models! For example, course_dc3b_052k.shp (a.k.a. the Other Pizza Hut) has 91 draws but only 89 textures, foiling our one-to-one approach. So clearly, the Crazy Taxi engine is doing something slightly more sophisticated to associate DLs with their textures.
To rectify this, it’s time we briefly returned to the humble .shp file, since there’s one block of data there we haven’t yet explored.
The final unks
By the end of Part 2, here’s the Rust struct we used to parse our .shp file header:
#[derive(DekuRead)]
#[deku(endian = "big")]
pub struct ShpHeader {
    #[deku(assert_eq = "1.0")]
    pub version: f32,
    unk_block1: [u8; 0xc8],
    // vertex attributes
    pub pos_offset: u32,
    pub norm_offset: u32,
    pub clr_offsets: [u32; 2],
    pub tex_offsets: [u32; 8],
    padding0: [u8; 0x14],
    // final four offsets
    pub unk_offset0: u32,
    pub pos_offset_dupe: u32,
    pub display_list_offset: u32,
    pub texture_list_offset: u32,
}
Note that we have two remaining unknown parts: a block of 0xc8 bytes near the start, and one of the “final four offsets” to some unknown data elsewhere in the file. If there’s some association between draw calls and textures, it would need to be of variable size and possibly much larger than 0xc8 bytes, so we can probably rule that section out. Instead, let’s take a look at the data pointed to by Pizza Hut’s unk_offset0:
course_4b_048_a_ph.shp
Offset
00000000 ⋮ 000020400000205000002060000020700000208000002090000020a0000020b0000020c0000020d0000020e0000020f000002100000021100000212000002130000021400000215000002160000021700000218000002190000021a0000021b0000021c0000021d0000021e0000021f000002200000022100000222000002230000022400000225000002260000022700000228000002290000022a0000022b0000022c0000022d0000022e0000022f000002300000023100000232000002330000023400000235000002360000023700000238000002390000023a0000023b0000023c0000023d0000023e0000023f000002400000024100000242000002430000024400000245000002460000024700000248000002490000024a0000024b0000024c0000024d0000024e0000024f000002500000025100000252000002530000025400000255000002560000025700000258000002590000025a0000025b0000025c0000025d0000025e0000025f000002600000026100000262000002630000026400000265000002660000026700000268000002690000026a0000026b0 ⋮ 000083e0
Bytes
(start of file)
0x2040 hidden
0x5d20 hidden
(end of file)
ASCII
-
⋮
⋮
-
Data Inspector Range:
| Bits | uint | int | float |
|---|---|---|---|
| 8 | - | - | - |
| 16 | - | - | - |
| 32 | - | - | - |
Endianness:
For a long time, I just referred to this as the “mystery shp section”, since it has a sorta chaotic structure that didn’t clearly map to anything.
It also has some somewhat misleading features, such as the fact that 100% of the shape files’ mystery sections start with 00000038 followed by a bunch of null bytes. This, I can say now with the benefit of hindsight, is what we in the business call a red herring. You see, 0x38 happens to point exactly to the start of the unk_block1 in the shape file’s header, leading me to believe there was a connection between the two. And if there is, it sure isn’t related to what the remainder of this section represents!
But anyway, this section took me quite a while to crack, so please bear with me while I try to recap my thought process for decoding it.
Pattern recognition
Here’s the mystery section data again:
course_4b_048_a_ph.shp
Offset
00000000 ⋮ 000020400000205000002060000020700000208000002090000020a0000020b0000020c0000020d0000020e0000020f000002100000021100000212000002130000021400000215000002160000021700000218000002190000021a0000021b0000021c0000021d0000021e0000021f000002200000022100000222000002230000022400000225000002260000022700000228000002290000022a0000022b0000022c0000022d0000022e0000022f000002300000023100000232000002330000023400000235000002360000023700000238000002390000023a0000023b0000023c0000023d0000023e0000023f000002400000024100000242000002430000024400000245000002460000024700000248000002490000024a0000024b0000024c0000024d0000024e0000024f000002500000025100000252000002530000025400000255000002560000025700000258000002590000025a0000025b0000025c0000025d0000025e0000025f000002600000026100000262000002630000026400000265000002660000026700000268000002690000026a0000026b0 ⋮ 000083e0
Bytes
(start of file)
0x2040 hidden
0x5d20 hidden
(end of file)
ASCII
-
⋮
⋮
-
Data Inspector Range:
| Bits | uint | int | float |
|---|---|---|---|
| 8 | - | - | - |
| 16 | - | - | - |
| 32 | - | - | - |
Endianness:
If you stare at the bytes long enough, you might notice that after the first few dozen bytes, there’s a pattern of 4-byte values like dfdfdfff or ffffffff regularly occurring every 36 bytes. And if you count the total bytes from the start of the section to the last such 4-byte value at offset 0x26b4, that gives 1,656 bytes, which is a multiple of 36. Thus, it seems likely that this section is composed of 36-byte blocks.
And! As it happens, , which is exactly the number of draw calls/textures in this Pizza Hut model!
Moreover, if we ignore the first red herring block, each block seems to start with a suspiciously offset-sized value, like 000026c0 in the second block, which happens to point to the model’s first Display List. The third block starts with 00002a00, which the start of another Display List, and so on. Indeed, the only block that doesn’t follow this pattern is our red herring at the start.
To me, this is was enough to suggest that each of these blocks might be metadata about each of the DLs. And with a bit more poking around at the values, I was able to pretty quickly deduce that each block’s first u32 was a DL offset, the second was that DL’s length, and the third always seemed to be smallish u32 that always seemed to be less than the number of textures. So, I tried parsing them with something like this:
#[derive(DekuRead)]
#[deku(endian = "big")]
pub struct ShapeDrawInfo {
    pub display_list_addr: u32,
    pub display_list_size: u32,
    pub texture_index: u32,
    pub unk_0x0c: u32,
    pub unk_0x10: u32,
    pub unk_0x14: u32,
    pub unk_0x18: u32,
    pub unk_0x1c: u32,
    pub unk_0x20: u32,
}Finally, if for each ShapeDrawInfo we draw the DL at display_list_addr with the texture specified by texture_index, we get this:
Pizza Time
At last, we are ready to go full Hut. Behold:
Magnificent. And, if we compare this poldc1 model with a screenshot of the Arcade Mode version of Pizza Hut, we find that it is a match:
Now let’s see if the poldc2 version matches Original Mode:
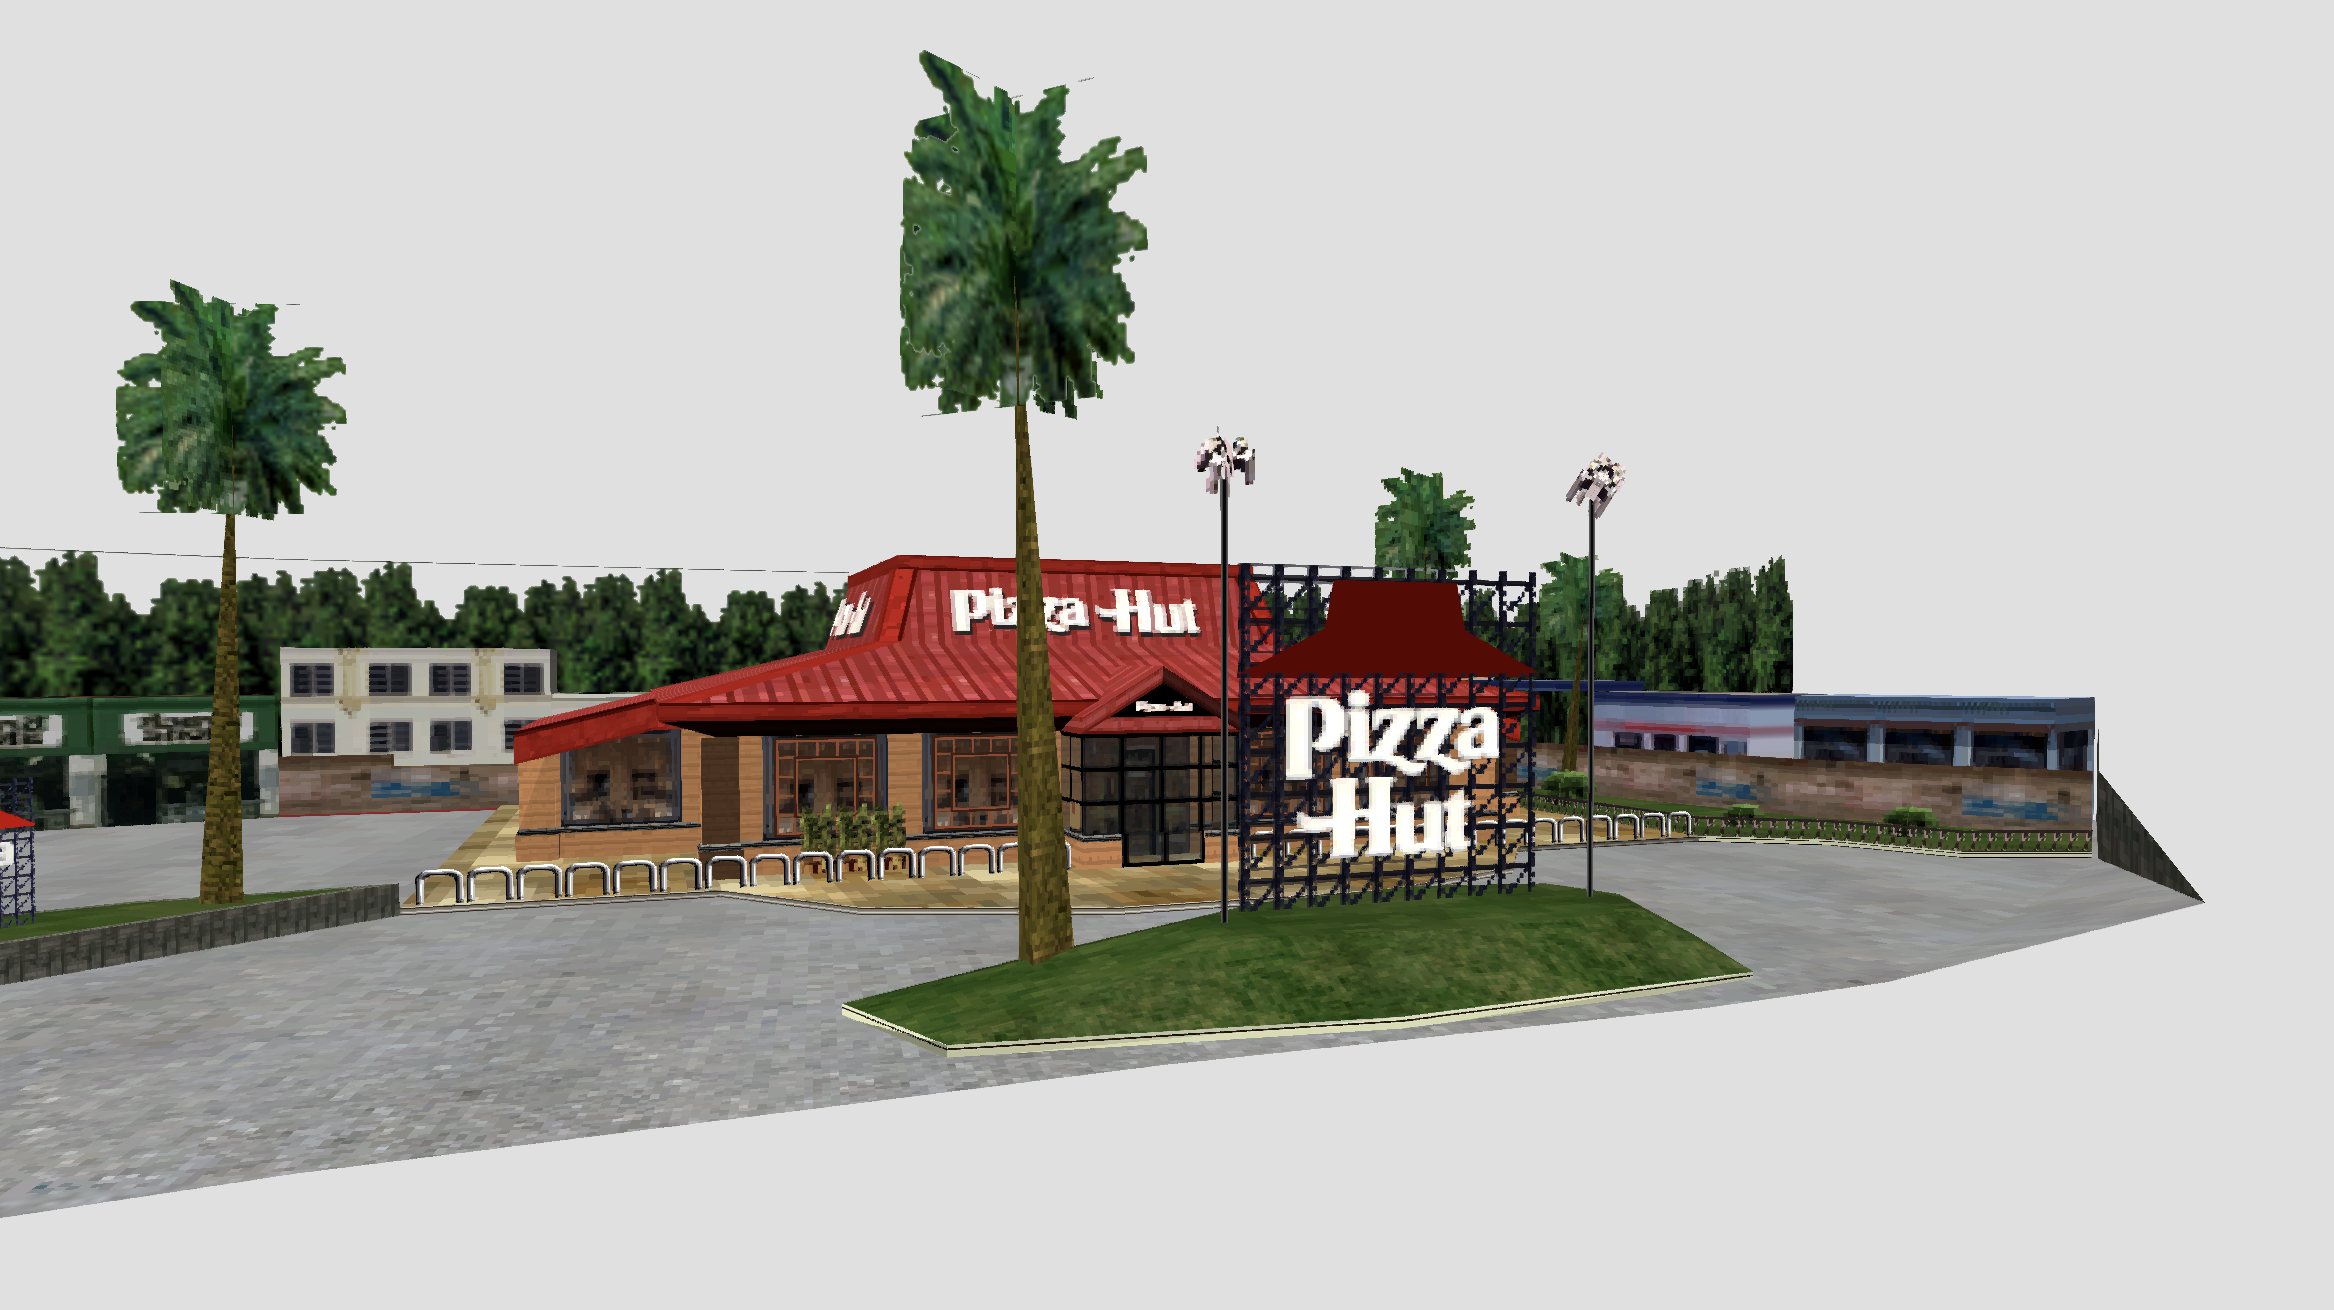
Theory confirmed, but that’s not all! Through the use of judicious greping, we can determine the .shp for any of our beloved brands, letting us finally display any storefront we could possibly want:
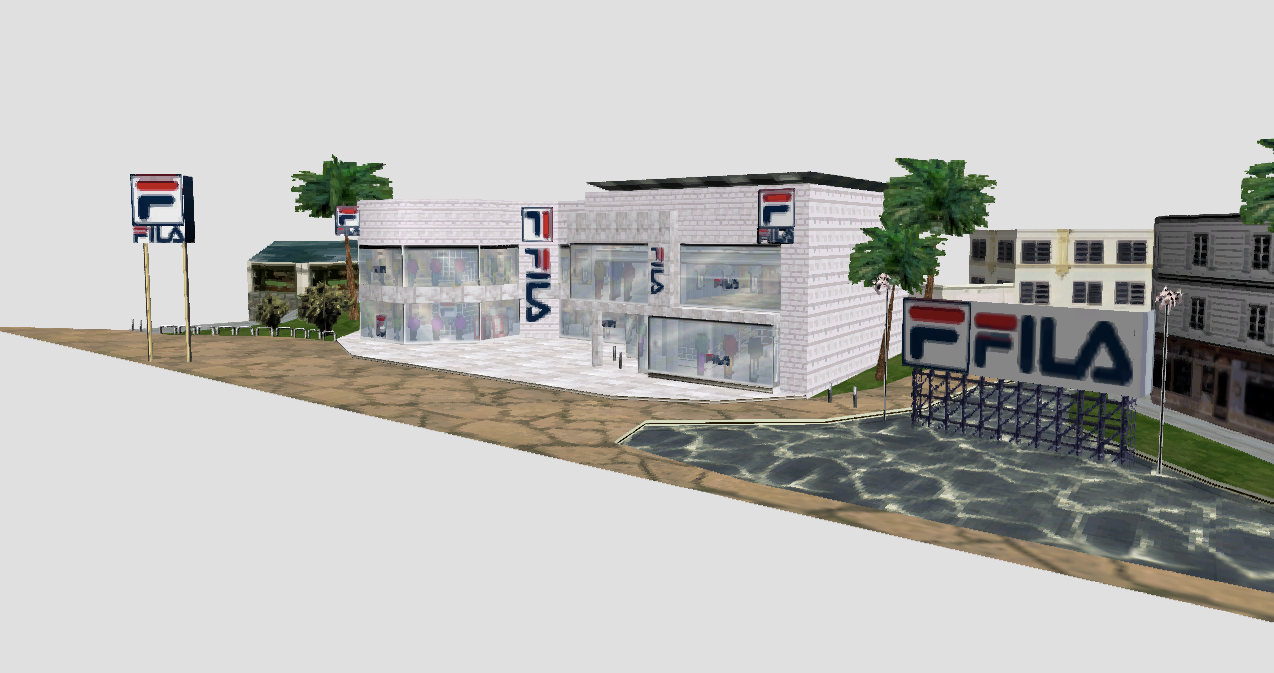
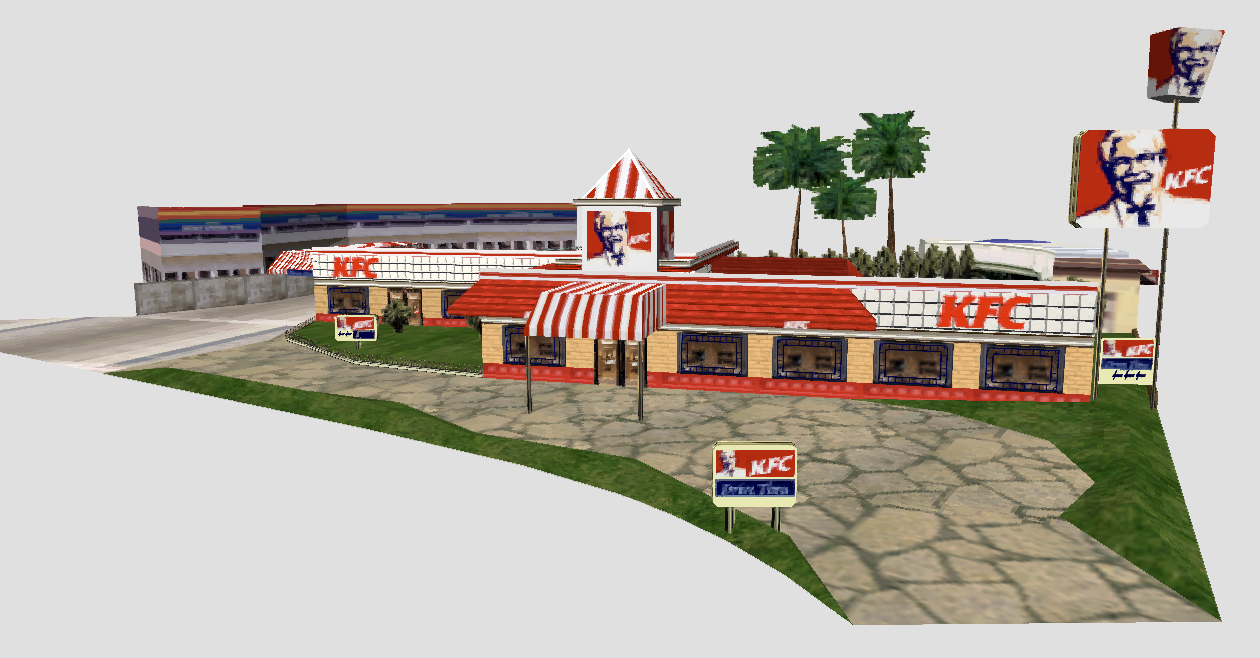
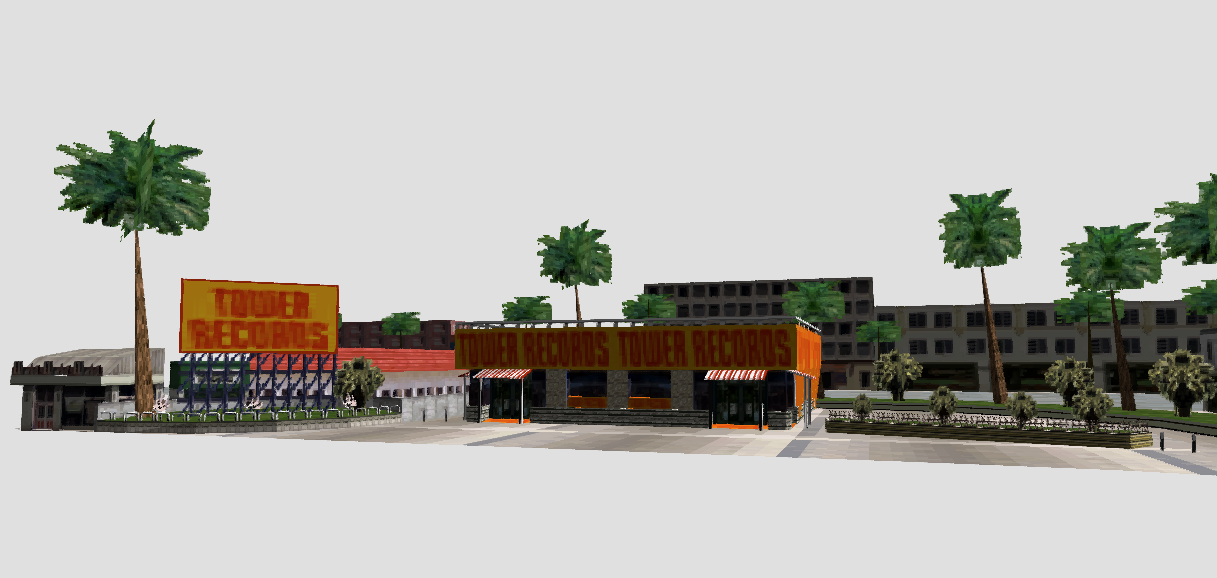
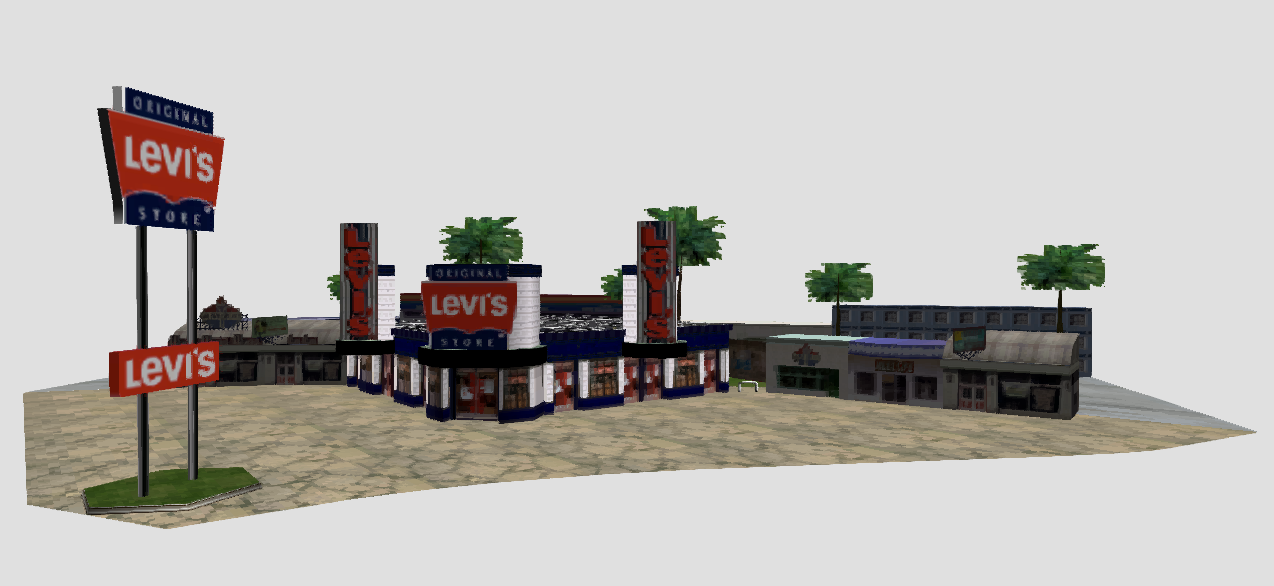
Indeed, any individual shape file we choose can now be rendered! Which naturally begs the question, what would happen if we render them all at once?
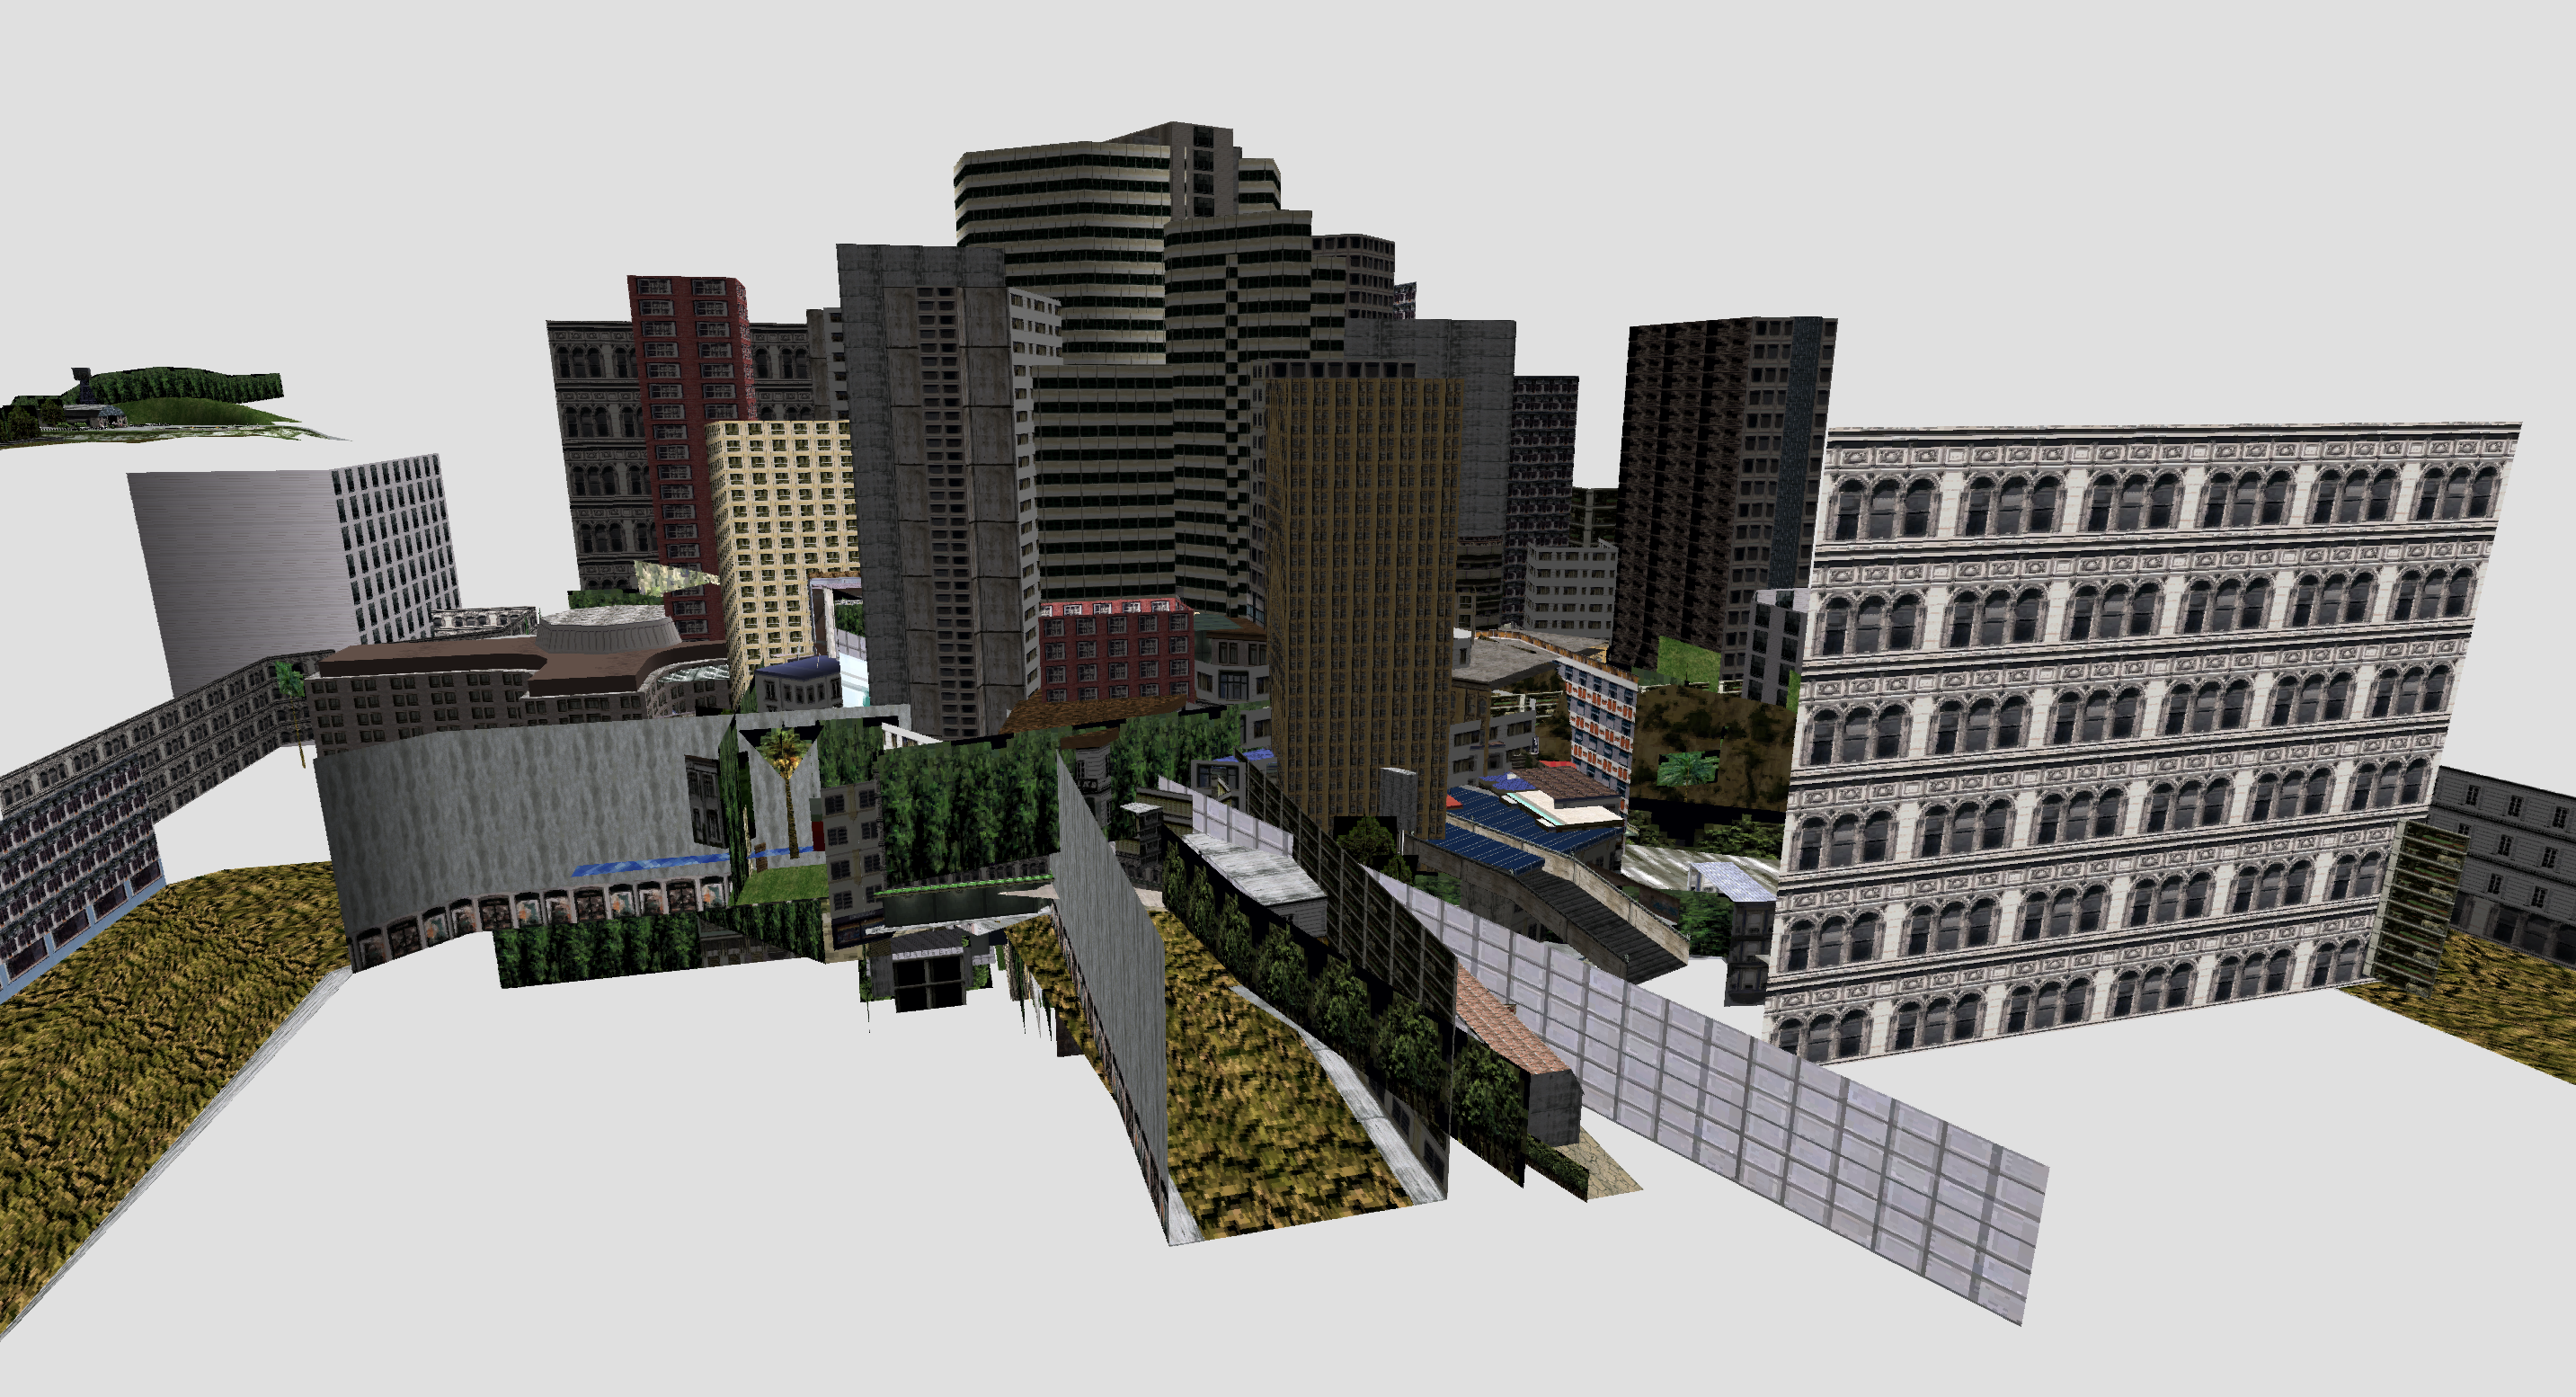
Hm. That, um, doesn’t seem right. As it happens, there’s a bit more involved in assembling each of these pieces to form the game world. In the next post we’ll dive into that and, hopefully, end up with a nearly complete Crazy Taxi level!